

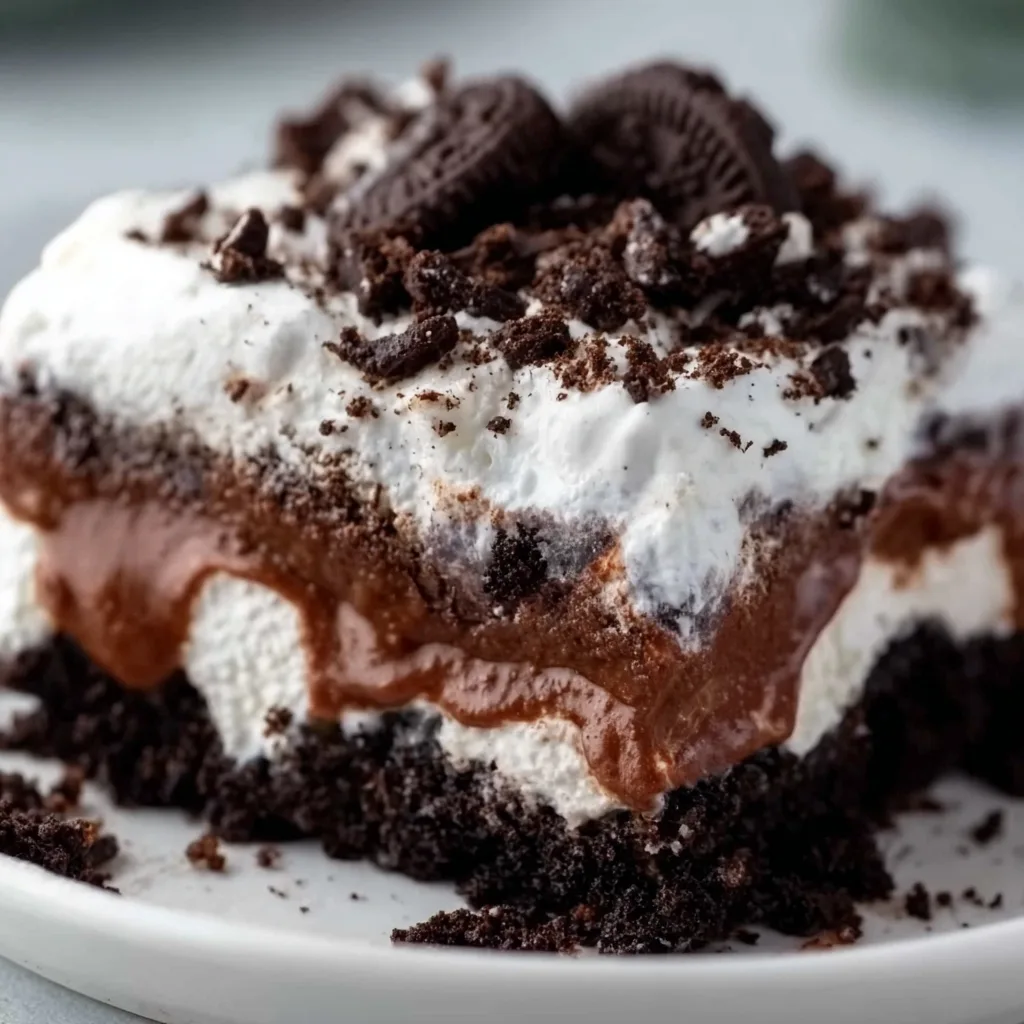
No Bake Oreo Chocolate Lasagna is the dreamy, creamy dessert that’s been stealing hearts at every gathering I’ve hosted lately. Imagine layers of crushed Oreos, velvety chocolate pudding, and fluffy whipped cream coming together in perfect harmony. The best part? No oven required! I’ve always been drawn to desserts that deliver maximum wow-factor with minimal effort, and this one hits all the right notes. When summer temperatures soar, this chilled treat from Treatiful becomes my go-to showstopper that never fails to impress.
Table of Contents
Recipe
Print
No Bake Oreo Chocolate Lasagna Recipe
- Prep Time: 20 minutes
- Cook Time: 0 minutes
- Total Time: 4 hours 20 minutes
- Yield: 12 servings
- Category: Dessert
- Method: No-Bake
- Cuisine: American
- Diet: Vegetarian
Description
No Bake Oreo Chocolate Lasagna is creamy, decadent, and irresistibly easy to make. Layers of crushed Oreo cookies, silky cream cheese filling, rich chocolate pudding, and fluffy whipped topping create the ultimate chilled dessert perfect for parties, holidays, and chocolate lovers.
Ingredients
36 Oreo cookies, crushed
1/2 cup unsalted butter, melted
8 ounces cream cheese, softened
1 cup powdered sugar
2 cups whipped topping, divided
2 boxes instant chocolate pudding mix, 3.9 ounces each
3 cups cold milk
1 cup mini chocolate chips
Extra crushed Oreos for garnish
Instructions
1. In a medium bowl, mix crushed Oreo cookies with melted butter until combined.
2. Press the Oreo mixture firmly into the bottom of a 9×13-inch baking dish.
3. Refrigerate the crust for 15 minutes to set.
4. In a large bowl, beat cream cheese and powdered sugar until smooth and creamy.
5. Fold in 1 cup whipped topping until fluffy.
6. Spread the cream cheese layer evenly over the chilled Oreo crust.
7. In another bowl, whisk chocolate pudding mix with cold milk for 2 minutes until thickened.
8. Spread the chocolate pudding evenly over the cream cheese layer.
9. Top with the remaining whipped topping and spread smoothly.
10. Sprinkle mini chocolate chips and extra crushed Oreos over the top.
11. Cover and refrigerate for at least 4 hours before slicing and serving.
Notes
Use double-stuffed Oreos for an extra rich dessert.
Chill overnight for the cleanest layers and best texture.
Do not use cook-and-serve pudding mix.
Store covered in the refrigerator for up to 4 days.
Why You’ll Love This No Bake Oreo Chocolate Lasagna
A Make-Ahead Miracle
This dessert is a time-management dream come true! I love that I can prepare it the day before any gathering, allowing those magical flavors to meld overnight in the refrigerator. The Oreo crust becomes perfectly set, while the creamy layers develop an even richer taste profile. I’ve found that 8 hours of chilling time creates the ideal texture—firm enough to slice cleanly but still wonderfully creamy. Plus, when party day arrives, I’m not frantically rushing around the kitchen. Instead, I’m relaxed and ready to enjoy my guests’ delighted expressions at first bite.
Perfect for Any Occasion
I’ve served this crowd-pleasing dessert at everything from casual backyard barbecues to elegant birthday celebrations. Its versatility is unmatched! The striking layers create a visual impact that elevates any dessert table, while the familiar Oreo flavor appeals to practically everyone. Children’s eyes light up at the sight of their favorite cookies transformed, while adults appreciate the not-too-sweet balance and sophisticated presentation. I’ve even made mini versions in clear plastic cups for potlucks—individual servings that disappear in record time!
Essential Tips & Tricks
Mastering the Layers
The secret to picture-perfect layers lies in patience and temperature. I always ensure each layer is properly set before adding the next—typically 15-20 minutes in the refrigerator between additions does the trick. Room temperature cream cheese blends much more smoothly with the sugar, preventing those pesky lumps that can ruin the texture. For the Oreo crust, I’ve found that a food processor creates the most consistent crumb, but placing cookies in a ziplock bag and using a rolling pin works wonderfully too. The melted butter should be warm but not hot when mixed with the crumbs for optimal binding.
Choosing Quality Ingredients
Don’t skimp on the whipped topping for this dessert! While store-bought Cool Whip is convenient, I sometimes make my own whipped cream with a tablespoon of powdered sugar and a splash of vanilla for an elevated touch. For the chocolate pudding layer, instant pudding mix works perfectly, but be sure to follow the package directions exactly—I whisk vigorously for a full two minutes to achieve that silky texture. Quality chocolate for garnish makes a noticeable difference in the final presentation, whether you choose chocolate curls, mini chips, or a light dusting of cocoa powder.
Serving Ideas & Creative Variations
Seasonal Adaptations
This dessert transforms beautifully with the seasons! For summer gatherings, I add fresh strawberries or raspberries between the chocolate and whipped cream layers for a burst of brightness. In autumn, I incorporate a thin layer of caramel sauce and a sprinkle of sea salt for a salted caramel twist that pairs wonderfully with the chocolate. Winter holidays call for crushed peppermint candies on top, creating a festive chocolate-mint combination. The versatility reminds me of my Peanut Butter Layered Delight, which follows a similar layering concept but with different flavors.
Dietary Accommodations
I love how easily this recipe adapts to various dietary needs without sacrificing flavor. For gluten-sensitive guests, I use gluten-free chocolate sandwich cookies for the crust. When serving friends who prefer less sugar, I prepare the pudding layer with sugar-free instant pudding mix and use a light whipped topping. For a dairy-conscious version, dairy-free cream cheese alternatives work surprisingly well, and coconut milk-based whipped toppings provide that essential fluffy texture. I’ve even created mini portions in stemless wine glasses for elegant individual servings that allow for personalized toppings.
Storage & Troubleshooting Guide
Keeping It Fresh
This dessert maintains its peak freshness when stored properly. Always cover tightly with plastic wrap to prevent the whipped topping from absorbing refrigerator odors or developing a skin. While it tastes best within 2-3 days, I’ve successfully kept it for up to 5 days with proper storage. For the freshest presentation, I sometimes reserve a small portion of the whipped topping and Oreo crumbs to refresh the top layer just before serving on day 2 or 3. Never freeze the completed dessert—the textures will separate upon thawing—but you can prepare and freeze the crust up to a month ahead.
Fixing Common Issues
Even the most experienced bakers encounter texture troubles occasionally! If your pudding layer seems too soft, it likely needs more setting time in the refrigerator—I give it at least 30 minutes before adding the next layer. For a crust that crumbles when serving, the solution is usually more melted butter in the base or more thorough packing with the back of a measuring cup. If cream cheese lumps appear in your filling, let the mixture come to room temperature, then beat on low speed, gradually increasing to medium until smooth. For cleaner slices, dip your knife in hot water and wipe clean between cuts.
Frequently Asked Questions
Can I make No Bake Oreo Chocolate Lasagna ahead of time?
Absolutely! It actually improves with 8-24 hours of refrigeration, making it perfect for preparing a day in advance. The flavors meld beautifully and the texture sets to perfection.
What’s the best way to crush the Oreos?
A food processor creates the most uniform crumbs, but placing cookies in a sealed bag and crushing with a rolling pin works great too. Leave some larger pieces for texture contrast.
Can I use homemade whipped cream instead of Cool Whip?
Yes! Whip 2 cups of heavy cream with 1/4 cup powdered sugar and 1 teaspoon vanilla until stiff peaks form. It’s slightly less stable than Cool Whip but offers superior flavor.
Why is my pudding layer not setting properly?
Ensure you’re using instant pudding (not cook-and-serve) and whisking with cold milk for the full recommended time. Allow at least 30 minutes of refrigeration before adding the next layer.
How do I get clean slices when serving?
Chill the dessert thoroughly (at least 4 hours), then use a sharp knife dipped in hot water and wiped clean between each cut for picture-perfect No Bake Oreo Chocolate Lasagna slices.
Final Thoughts
This No Bake Oreo Chocolate Lasagna has become my signature dessert for good reason—it consistently delivers smiles with every creamy, chocolatey bite. What I love most is watching guests’ eyes widen as they taste those perfect layers working together in harmony. The balance of textures—from the crisp cookie base to the silky pudding and airy whipped topping—creates a dessert experience that feels indulgent yet surprisingly light. Don’t forget to check out more of my layered dessert creations on Pinterest for endless inspiration!