


This Red Velvet Oreo Cheesecake is what dessert dreams are made of—rich, velvety layers of crimson cake topped with a cloud-like Oreo cheesecake that melts on your tongue. I’ve been perfecting this recipe for years, and trust me, the contrast between tangy cream cheese, chocolate cookie crumbles, and that signature red velvet flavor creates pure magic on your taste buds. The first time I served this at a family gathering, my aunt (who claims to “never eat dessert”) asked for seconds! It’s become my most-requested holiday treat for good reason.
Table of Contents
Recipe
Print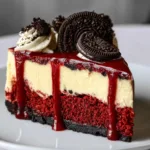
Decadent Red Velvet Oreo Cheesecake Recipe
- Prep Time: 20 minutes
- Cook Time: 55 minutes
- Total Time: 5 hours 15 minutes
- Yield: 10 slices
- Category: Dessert
- Method: Baking
- Cuisine: American
- Diet: Vegetarian
Description
This Decadent Red Velvet Oreo Cheesecake is a rich, creamy dessert featuring a chocolatey Oreo crust, smooth red velvet cheesecake filling, and chunks of Oreos throughout. Topped with whipped cream or chocolate drizzle, it’s the ultimate indulgent treat for special occasions or dessert lovers.
Ingredients
For the Crust:
24 Oreo cookies, crushed
5 tablespoons unsalted butter, melted
For the Cheesecake Filling:
16 oz cream cheese, softened
3/4 cup granulated sugar
2 large eggs
1/2 cup sour cream
1 teaspoon vanilla extract
1 tablespoon cocoa powder
1 tablespoon red food coloring
1 teaspoon white vinegar
1 cup crushed Oreo cookies
Optional topping:
Whipped cream
Chocolate drizzle
Extra Oreo crumbs
Instructions
1. Preheat oven to 325°F (165°C) and grease a springform pan.
2. Mix crushed Oreos with melted butter and press into the bottom of the pan to form the crust.
3. Bake crust for 8–10 minutes, then let cool.
4. In a large bowl, beat cream cheese until smooth.
5. Add sugar and mix until creamy.
6. Add eggs one at a time, mixing well after each addition.
7. Stir in sour cream, vanilla extract, cocoa powder, red food coloring, and vinegar.
8. Fold in crushed Oreo cookies.
9. Pour cheesecake batter over the crust.
10. Bake for 50–60 minutes until center is set but slightly jiggly.
11. Turn off oven and let cheesecake cool gradually, then refrigerate for at least 4 hours.
12. Top with whipped cream, chocolate drizzle, and extra Oreo crumbs before serving.
Notes
Use room temperature ingredients for a smooth batter.
Do not overmix to prevent cracks.
Cool slowly in the oven for best texture.
Store in the refrigerator for up to 5 days.
Why You’ll Love This Red Velvet Oreo Cheesecake
A Show-Stopping Dessert That’s Easier Than It Looks
Don’t let the gorgeous layers intimidate you! This Red Velvet Oreo Cheesecake looks professional but comes together with straightforward steps. The contrasting textures create an incredible mouthfeel—the dense, moist red velvet base against the silky, creamy cheesecake layer studded with cookie chunks. I love watching people’s eyes widen when they take their first bite. The deep crimson color makes it perfect for Valentine’s Day, Christmas, or anytime you need to impress without spending hours in the kitchen. Trust me, people will think you spent all day on this masterpiece!
Perfect Balance of Flavors in Every Bite
What makes this cheesecake special is the flavor harmony between the slight cocoa notes in the red velvet layer and the sweet vanilla-chocolate contrast from the Oreo cheesecake. The tanginess from the cream cheese cuts through the sweetness perfectly, creating a dessert that’s rich without being overwhelming. I’ve added just a touch of espresso powder to enhance the chocolate notes without tasting like coffee. The crushed Oreos provide little pockets of crunch and that familiar chocolate cookie flavor that everyone loves. It’s like getting two classic desserts in one magnificent slice!
Essential Tips & Tricks
Mastering the Perfect Cheesecake Texture
The secret to a crack-free cheesecake starts with room temperature ingredients—especially the cream cheese! Cold ingredients lead to lumps and uneven mixing. I always set my dairy products out at least two hours before baking. Another game-changer: the water bath method. Place your springform pan inside a larger pan filled with hot water to create gentle, even heat. This prevents the dreaded crack across the top! When mixing, beat on low speed to avoid incorporating too much air, which can cause the cheesecake to rise dramatically, then fall and crack while cooling. Your patience will be rewarded with silky-smooth perfection.
The Red Velvet Layer: Getting It Right
For that signature ruby-red color, use gel food coloring rather than liquid—you’ll need less and get more vibrant results. I recommend about 1-2 teaspoons depending on your desired intensity. The cocoa powder is crucial for authentic red velvet flavor, but don’t overdo it! Too much creates a chocolate cake rather than true red velvet. The buttermilk is non-negotiable—it provides the slight tang and tender crumb that defines red velvet. For the smoothest incorporation of ingredients, alternate adding dry ingredients and buttermilk to your batter, ending with dry. This prevents overmixing and keeps your cake layer light and tender.
Serving Ideas & Creative Variations
Stunning Presentation Techniques
Transform your Red Velvet Oreo Cheesecake into an absolute showstopper with a few finishing touches. My favorite topping is a ring of whipped cream rosettes around the edge, with crushed Oreos sprinkled between them. For special occasions, I add white chocolate drizzle and fresh berries for color contrast. Another beautiful option: pipe cream cheese frosting around the edge and place whole mini Oreos between the swirls. For a truly decadent finish, try a chocolate ganache pour that cascades slightly down the sides. Serve on a cake stand with a warm pot of coffee for the ultimate dessert experience!
Exciting Flavor Twists on the Classic
Don’t be afraid to experiment with this versatile recipe! For a mint chocolate version, add 1/2 teaspoon mint extract to the cheesecake layer and use mint Oreos. During fall, I love adding pumpkin puree (about 1/3 cup) and warm spices to the cheesecake layer for a seasonal twist. For chocolate lovers, swap the regular Oreos for chocolate-filled ones and add mini chocolate chips to both layers. My personal favorite variation includes a layer of salted caramel between the red velvet base and cheesecake—it adds an irresistible sweet-salty dimension that elevates the entire dessert. The possibilities are endless!
Storage & Troubleshooting Guide
Keeping Your Cheesecake Fresh
For maximum freshness, store your Red Velvet Oreo Cheesecake in the refrigerator, covered loosely with plastic wrap or in an airtight container. It will maintain its peak flavor for up to 5 days, though the texture is best within the first 3 days. If you need to make it ahead for a special event, the cheesecake actually benefits from 24 hours of chilling—the flavors meld beautifully! For longer storage, you can freeze individual slices wrapped tightly in plastic wrap, then aluminum foil. They’ll keep for up to 2 months. When ready to enjoy, thaw overnight in the refrigerator rather than at room temperature for the best texture.
Fixing Common Cheesecake Problems
If your cheesecake develops cracks despite your best efforts, don’t panic! This is easily disguised with strategic toppings like whipped cream, ganache, or fruit compote. For a sunken center, which usually happens from overmixing or temperature fluctuations, a decorative filling of sweetened whipped cream creates a beautiful solution. If your red velvet layer turns out too dense, ensure you’re not overmixing the batter next time—stop as soon as ingredients are incorporated. For a cheesecake that’s too soft in the center, it likely needed more baking time. The perfect cheesecake should have a slight wobble in the center when you gently shake the pan.
Frequently Asked Questions
Can I make this Red Velvet Oreo Cheesecake without a springform pan?
You can use a deep regular cake pan lined with parchment paper with extra overhang as “handles.” The presentation won’t be as clean, but the taste remains delicious!
How do I know when my cheesecake is done baking?
The edges should be set, but the center should still have a slight jiggle—like Jell-O. It will continue setting as it cools. Don’t wait until it’s completely firm.
Can I use a different cookie instead of Oreos?
Absolutely! Graham crackers, chocolate chip cookies, or Biscoff cookies all work beautifully. Just adjust sugar levels slightly if using a less sweet cookie.
Why did my red velvet layer turn out dry?
Overbaking is usually the culprit. Check your oven temperature with a separate thermometer and start checking for doneness 5 minutes before the recipe suggests.
Can I make mini Red Velvet Oreo Cheesecakes instead?
Yes! Use a muffin tin with liners and reduce baking time to about 20-25 minutes. This makes perfect individual servings for parties.
Final Thoughts
This Red Velvet Oreo Cheesecake has become my signature dessert for good reason—it combines two beloved flavors in one unforgettable treat that never fails to impress. The striking appearance, contrasting textures, and balanced flavors make every bite a little celebration. While it might seem ambitious at first glance, the steps are manageable, and the results are absolutely worth it. I’d love to see your creations on Pinterest! Whether for holidays, birthdays, or simply because you deserve something special, this cheesecake is guaranteed to become a favorite in your recipe collection.