


These caramel bars are quite possibly the most irresistible treat to ever grace my kitchen. With their buttery shortbread base, gooey caramel center, and chocolate drizzle, they strike that perfect balance between sweet and satisfying. I’ve been perfecting this recipe for years, and let me tell you—the aroma that fills your home while these bake is worth the effort alone! Whether you’re planning a special dessert for family dinner or need something impressive for a bake sale, these caramel bars never disappoint. They’re surprisingly simple to make but deliver that wow factor that’ll have everyone asking for your secret recipe. Check out my other sweet treats for more inspiration!
Table of Contents
Recipe
Print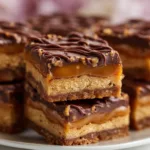
Delicious Caramel Bars Recipe
- Prep Time: 15 minutes
- Cook Time: 30 minutes
- Total Time: 45 minutes
- Yield: 16 bars
- Category: Dessert
- Method: Baking
- Cuisine: American
- Diet: Vegetarian
Description
These delicious caramel bars are soft, buttery, and layered with rich, gooey caramel and chocolate for an easy homemade dessert everyone will love.
Ingredients
1 cup butter, softened
1 cup brown sugar
2 cups all-purpose flour
1 cup rolled oats
1 teaspoon baking soda
1/2 teaspoon salt
1 cup semi-sweet chocolate chips
1 cup caramel candies, unwrapped
2 tablespoons heavy cream
1 teaspoon vanilla extract
Instructions
1. Preheat oven to 350°F.
2. Grease a 9×13-inch baking pan or line with parchment paper.
3. In a large bowl, cream together butter and brown sugar until smooth.
4. Add flour, oats, baking soda, and salt, then mix until crumbly dough forms.
5. Press half of the dough evenly into the bottom of the pan.
6. Bake for 10 minutes.
7. In a saucepan, melt caramel candies with heavy cream over low heat until smooth.
8. Remove crust from oven and sprinkle chocolate chips evenly over it.
9. Pour melted caramel over the chocolate chips.
10. Crumble remaining dough over the caramel layer.
11. Return to oven and bake for 20 to 25 minutes until golden.
12. Let cool completely before slicing into bars.
Notes
Use parchment paper for easy removal.
Do not overbake to keep bars soft.
Chill slightly for cleaner cuts.
Add chopped nuts for extra crunch.
Why You’ll Love These Caramel Bars
Perfect Texture Combination
There’s something magical about the textural contrast in these bars that makes them absolutely addictive. The shortbread base provides that perfect crumbly foundation that somehow stays intact when you bite into it. Then comes the star of the show—that luscious caramel layer that’s just the right consistency between flowing and firm. It’s not too chewy where it sticks to your teeth, but perfectly tender with a gentle pull. And that final touch of chocolate? It creates a delicate snap that gives way to all the layers beneath. The interplay of textures creates a sensory experience that’s genuinely unforgettable.
Make-Ahead Convenience
One of the best features of these caramel bars is how wonderfully they hold up over time. You can easily prepare them a day or two before your event, and they’ll taste just as amazing—maybe even better! The flavors have time to meld together, with the caramel slightly infusing into the shortbread base. This makes them perfect for busy hosts who need to plan ahead. I love making a batch on Friday for weekend gatherings, knowing they’ll be perfectly set and ready to impress. Plus, they slice more cleanly after proper cooling, giving you those picture-perfect squares that look like they came from a bakery.
Essential Tips & Tricks
Perfecting the Caramel Layer
Creating silky-smooth caramel is the key to elevating these bars from good to extraordinary. Always use a heavy-bottomed saucepan to prevent hot spots that can burn your caramel. Watch the color carefully—you’re looking for that rich amber tone that signals depth of flavor without bitterness. Never walk away during this process! I like to keep a pastry brush dipped in water nearby to brush down any sugar crystals that form on the sides of the pan. This prevents crystallization and ensures a perfectly smooth result. Remember that caramel continues cooking even after you remove it from heat, so act quickly when it reaches the right color.
Achieving Clean, Professional Cuts
Nothing ruins beautiful caramel bars faster than messy, jagged cuts! For bakery-worthy presentation, chill your bars completely before cutting—I recommend at least 2 hours in the refrigerator or 30 minutes in the freezer. Use a large, sharp knife dipped in hot water and wiped clean between each cut. This prevents the caramel from sticking and gives you those pristine edges. For extra precision, measure and mark your cuts before starting, especially if bringing these to a special event like a holiday gathering. I sometimes use a ruler for perfectly even portions that look as professional as they taste!
Serving Ideas & Creative Variations
Elegant Dessert Plating
Transform these humble caramel bars into an upscale dessert worthy of any special occasion. For individual servings, place a square on a dessert plate with a light dusting of sea salt and a small quenelle of lightly sweetened whipped cream. Add visual interest with a few fresh berries or a mint sprig for color contrast. For extra decadence, drizzle warm caramel sauce in an artistic pattern around the plate. I love adding a delicate chocolate decoration—like a simple curved piece—standing upright in the cream. These presentation touches elevate the bars from simple treats to sophisticated desserts that would be at home in a fine restaurant.
Flavor Twists and Add-Ins
While the classic version is divine, these caramel bars welcome creative variations! Try adding a flavor infusion to your caramel—a split vanilla bean, bourbon, or even lavender can create intriguing depth. For texture contrast, consider folding toasted nuts into the caramel layer—pecans and hazelnuts work beautifully. For a seasonal twist, add warming spices like cinnamon and nutmeg to the shortbread base. My personal favorite variation includes a thin layer of peanut butter between the shortbread and caramel for a nostalgic flavor combination that always gets rave reviews from friends and family.
Storage & Troubleshooting Guide
Proper Storage Methods
The key to longevity with these caramel bars is proper storage. At room temperature in an airtight container, they’ll maintain perfect texture for 3-4 days. For longer storage, refrigerate them for up to a week—just be sure to separate layers with parchment paper to prevent sticking. If you need to store them for even longer, they freeze beautifully for up to three months when wrapped individually in plastic wrap and placed in a freezer-safe container. Allow them to thaw in the refrigerator overnight before serving. I find they taste remarkably fresh even after freezing, making them perfect for emergency dessert situations!
Fixing Common Caramel Problems
Even experienced bakers occasionally encounter caramel challenges. If your caramel turns grainy, you’ve experienced crystallization—next time, add a teaspoon of corn syrup or lemon juice to prevent this. For caramel that’s too firm, gently warm the mixture with a tablespoon of cream. If it’s too runny, continue cooking until it reaches the soft-ball stage (235-240°F). Burned caramel unfortunately can’t be saved, so use a light-colored pan to better monitor the color changes. If your caramel layer separates from the shortbread base, try scoring the shortbread while still warm before adding the caramel, creating little grooves for better adhesion.
Frequently Asked Questions
Can I make these caramel bars without a candy thermometer?
Yes! Watch for visual cues instead—the caramel should be a deep amber color and coat the back of a spoon. The cold water test works too: drop a small amount into cold water; it should form a soft, pliable ball.
How do I know when the shortbread base is properly baked?
Look for light golden edges while the center remains pale. It should feel set but not hard when gently pressed. Overbaking will make the base too crumbly and difficult to cut cleanly.
Can I substitute brown sugar for white sugar in the caramel?
Absolutely! Brown sugar adds a deeper molasses flavor to these caramel bars. Just watch carefully as it may darken faster due to the existing molasses content.
What’s the best chocolate to use for the topping?
Semi-sweet chocolate provides the perfect balance, but dark chocolate (60-70% cacao) creates a sophisticated contrast to the sweet caramel. Milk chocolate works for a sweeter result.
Why did my caramel crystallize while cooking?
Sugar crystals likely formed on the sides of your pan. Next time, brush the sides with water using a pastry brush or add a teaspoon of corn syrup to prevent crystallization.
Final Thoughts
These caramel bars have become my signature dessert for good reason—they consistently impress while being surprisingly manageable to make. The combination of buttery shortbread, golden caramel, and chocolate creates a treat that’s both nostalgic and sophisticated. I love watching people’s expressions when they take their first bite! For more delicious recipes like these caramel bars, follow me on Pinterest where I’m always sharing new favorites. Whatever occasion you’re baking for, these bars deserve a spot in your recipe collection—they’re truly special.