

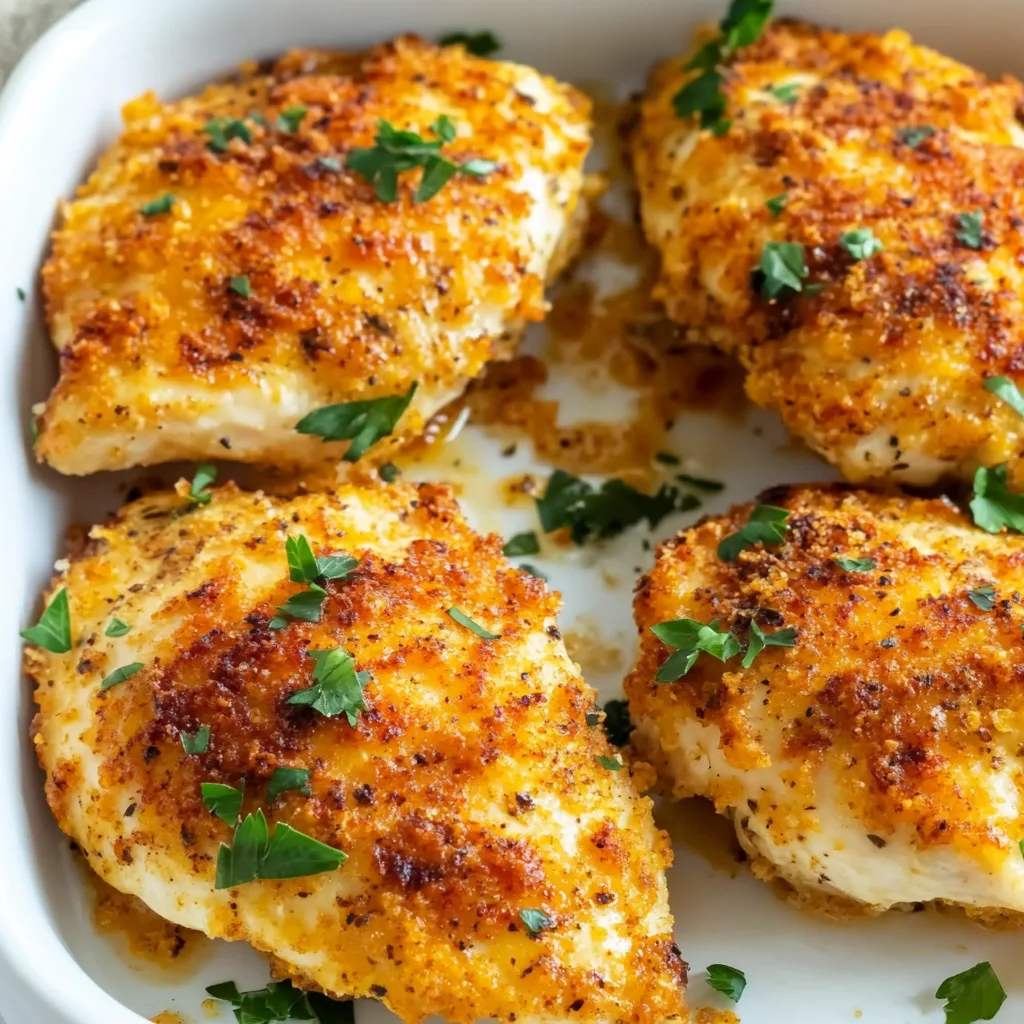
Crispy Baked Ranch Chicken has completely transformed my weeknight dinner routine! There’s something magical about that moment when you pull the baking sheet from the oven and hear that satisfying crackle as the golden coating settles. The tangy ranch seasoning infuses every bite with herb-flecked goodness, while the panko creates that irresistible crunch we all crave. I’ve tested countless chicken recipes over the years at Treatiful, but this one strikes the perfect balance between effortless preparation and “wow-factor” results that have my family rushing to the table.
Table of Contents
Recipe
Print
Crispy Baked Ranch Chicken Recipe | Easy & Delicious Dinner Idea
- Prep Time: 10 minutes
- Cook Time: 30 minutes
- Total Time: 40 minutes
- Yield: 4 servings
- Category: Dinner, Chicken, Baked
- Method: Baked
- Cuisine: American
Description
This Crispy Baked Ranch Chicken is a flavorful, easy dinner your whole family will love. Coated in ranch seasoning and crushed cornflakes or breadcrumbs, the chicken bakes up golden, crunchy, and tender—without deep frying.
Ingredients
4 boneless skinless chicken breasts or thighs
1/2 cup mayonnaise or Greek yogurt
1 packet (1 oz) ranch seasoning mix
1 1/2 cups crushed cornflakes or panko breadcrumbs
1/2 tsp garlic powder
1/2 tsp paprika
Salt and pepper to taste
Olive oil spray or drizzle (optional, for crispier finish)
Instructions
1. Preheat oven to 400°F. Line a baking sheet with parchment or foil.
2. In a bowl, mix mayonnaise (or yogurt) with half the ranch seasoning.
3. In another bowl, combine crushed cornflakes, remaining ranch mix, garlic powder, paprika, salt, and pepper.
4. Coat each chicken piece in the mayo mixture, then press into the crispy coating mixture until fully coated.
5. Place on baking sheet and lightly spray or drizzle with olive oil.
6. Bake for 25–30 minutes (internal temp 165°F), flipping once if desired for extra crisp.
7. Let rest 5 minutes before serving.
Notes
Use Greek yogurt for a lighter version with extra tang.
For spicy ranch chicken, add a pinch of cayenne to the crumb mix.
Serve with mashed potatoes, salad, or roasted vegetables.
Why You’ll Love This Crispy Baked Ranch Chicken
Perfect Texture Combination
The secret to success here lies in the contrasting textures. The exterior develops this gorgeous golden crust that shatters delightfully with each bite, while the interior stays incredibly juicy and tender. I’ve found that a quick dip in buttermilk before coating creates that perfect adhesion for the crumb mixture. The tanginess from the ranch seasoning blooms in the oven, infusing every morsel with herby, garlicky notes that dance on your tongue. Trust me, that first bite—when the crust gives way to succulent chicken—is absolutely worth the (minimal) effort!
Weeknight-Friendly Preparation
What makes this baked ranch chicken truly special is how seamlessly it fits into busy schedules. The hands-on prep takes just 15 minutes, then your oven does all the heavy lifting. I love that I can assemble everything while helping with homework or catching up on emails. No babysitting required! Unlike fried chicken that demands constant attention and creates a splatter zone in your kitchen, this method is beautifully clean. The result rivals any restaurant version but without the guilt or mess of deep-frying.
Essential Tips & Tricks
Perfecting the Coating Process
Creating that golden crust requires a methodical approach. I recommend setting up a proper dredging station with separate shallow dishes for each component. Keep one hand for wet ingredients and one for dry to prevent the dreaded “club hand” of clumped coating. For maximum crispiness, don’t rush the process—press the panko mixture firmly onto each piece, ensuring complete coverage. A light spritz of cooking spray before baking helps achieve that beautiful golden-brown color that signals perfection. These small details make a tremendous difference in the final texture.
Temperature and Timing Secrets
The perfect doneness hinges on maintaining the right oven environment. Always preheat thoroughly—I mean actually wait until that preheat light goes off! Position your rack in the upper-middle position to encourage browning without burning. For even cooking, use a wire rack set inside your baking sheet, which allows hot air to circulate completely around the chicken. This technique works beautifully for other crispy dishes too, like my Oven Baked Cheesy Tacos. Remember to let the chicken rest for 5 minutes after baking—this allows juices to redistribute for maximum tenderness.
Serving Ideas & Creative Variations
Complementary Side Dishes
This versatile chicken pairs beautifully with both light and hearty accompaniments. In summer, I love serving it alongside a crisp cucumber salad with dill and a squeeze of lemon—the cool crunch plays wonderfully against the warm, crispy chicken. For cooler months, roasted garlic mashed potatoes or buttery rice pilaf create a comforting base that soaks up any flavorful drippings. A simple honey-drizzled biscuit completes the meal with southern charm. For a lighter option that still satisfies, try pairing with my Baked Feta Potatoes with Lemon for a Mediterranean-inspired feast.
Flavor Twists and Adaptations
Don’t be afraid to make this recipe your own with creative variations! For a spicy kick, add cayenne or hot paprika to the coating. Swap traditional ranch for peppercorn ranch seasoning when you’re craving something with more bite. For an Italian twist, mix in grated Parmesan and Italian herbs instead of ranch. The technique works beautifully with chicken tenders for kids (with shorter cooking times) or boneless thighs for darker meat lovers. I’ve even used this coating method on thick-cut zucchini planks for a vegetarian option that disappears just as quickly as the chicken!
Storage & Troubleshooting Guide
Keeping It Crispy
Maintaining that signature crunch requires proper storage techniques. If you’re planning leftovers, slightly undercook the chicken initially (about 2 minutes less than recommended). Allow it to cool completely before refrigerating in a container lined with paper towels to absorb excess moisture. When reheating, skip the microwave which creates steam and soggy coating. Instead, place on a wire rack in a 350°F oven for 10-15 minutes until heated through. This method revives the exterior crispiness while keeping the interior juicy—almost as good as freshly made!
Solving Common Challenges
Even experienced cooks encounter occasional troubleshooting moments. If your coating isn’t browning properly, try positioning the rack higher in the oven or giving a light spray of cooking oil halfway through baking. Soggy bottom syndrome happens when chicken sits directly on the baking sheet—always use a wire rack! If the coating falls off during preparation, your chicken might be too wet; pat it thoroughly dry before starting the dredging process. For those avoiding dairy, coconut milk makes an excellent buttermilk substitute that still provides the necessary adhesion for perfect coating.
Frequently Asked Questions
Can I use chicken thighs instead of breasts for Crispy Baked Ranch Chicken?
Absolutely! Thighs work beautifully and stay even juicier. Adjust cooking time to about 30-35 minutes, or until they reach 165°F internally.
How do I make my own ranch seasoning?
Combine dried parsley, dill, chives, garlic powder, onion powder, salt, and pepper. Add a touch of buttermilk powder for authentic tang if available.
Can this recipe be made gluten-free?
Yes! Simply substitute gluten-free panko and ensure your ranch seasoning contains no gluten ingredients. The technique works exactly the same.
Is it possible to prepare this chicken in advance?
You can bread the chicken up to 8 hours ahead and refrigerate uncovered on a wire rack. This actually helps the coating adhere better during baking.
What’s the best way to check for doneness?
Use an instant-read thermometer inserted into the thickest part to reach 165°F. Visual cues include opaque (not translucent) meat with clear (not pink) juices.
Final Thoughts
This Crispy Baked Ranch Chicken has earned its place in my regular rotation because it delivers that perfect combination of convenience and crowd-pleasing flavor. The contrast between the crunchy exterior and juicy interior creates a textural magic that makes everyday dinners feel special. I love seeing eyes light up around the table when this golden-brown masterpiece makes its appearance! For more family-friendly recipes that combine ease with incredible flavor, check out my Pinterest collection where I’m constantly adding new inspiration.