

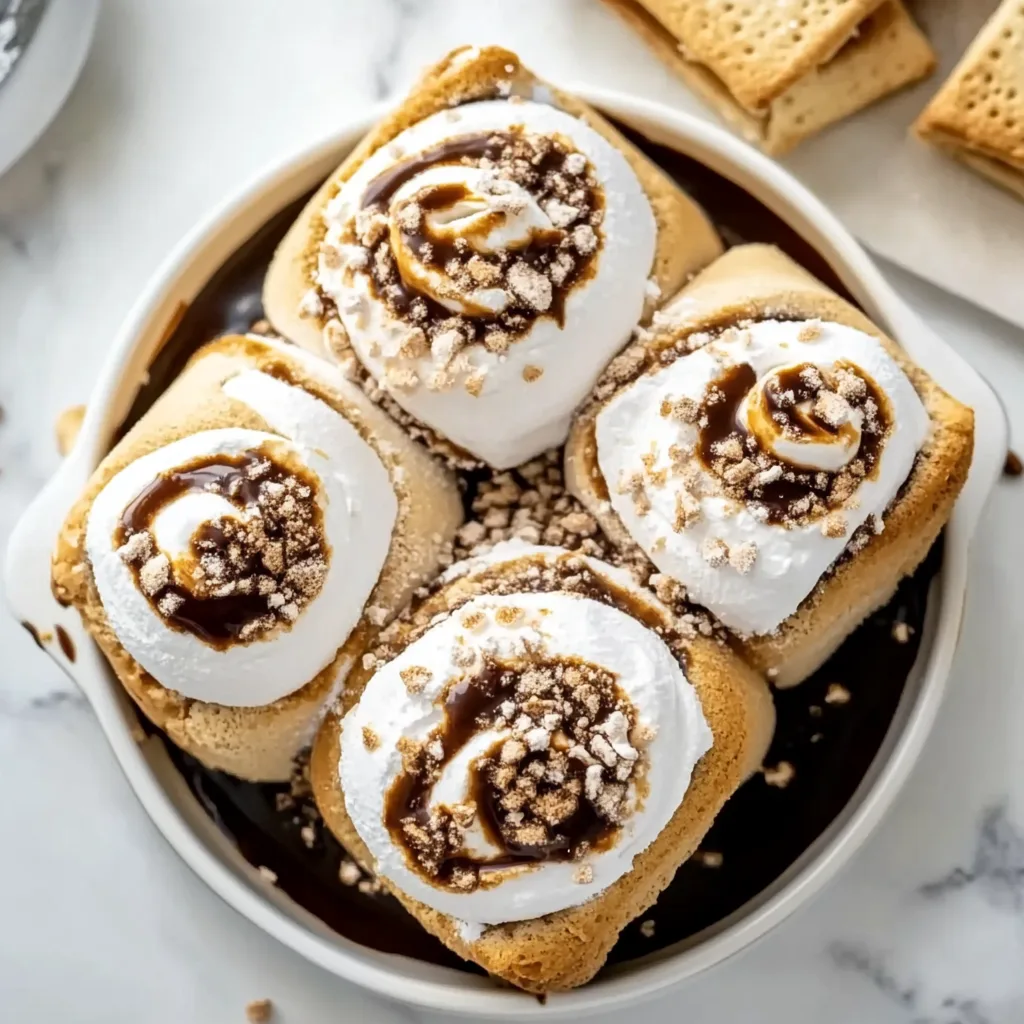
S’mores Roll-Ups are the perfect indoor twist on everyone’s favorite campfire treat! I’ve been making these gooey, chocolatey delights for years whenever my kids beg for s’mores but the weather isn’t cooperating. The combination of crispy tortillas, melty chocolate, and toasted marshmallows creates that nostalgic s’mores flavor without needing to build a fire. They’re quick enough for after-school snacks but special enough for movie nights—and way less messy than traditional s’mores! If you love the classic combination of graham crackers, chocolate and marshmallows, these roll-ups will become your new favorite indoor treat.
Table of Contents
Recipe
Print
Delicious S’mores Roll-Ups Recipe | Easy & Fun Dessert Idea
- Prep Time: 10 minutes
- Cook Time: 7 minutes
- Total Time: 17 minutes
- Yield: 8 roll-ups
- Category: Dessert, Snack, Kids
- Method: Stovetop
- Cuisine: American
- Diet: Vegetarian
Description
These easy s’mores roll-ups are packed with melted chocolate, gooey marshmallows, and crushed graham crackers, all rolled in soft sandwich bread and toasted with a buttery cinnamon-sugar crust. Kid-friendly, quick, and no campfire needed!
Ingredients
8 slices white sandwich bread, crusts removed
1/2 cup chocolate chips (or chocolate spread)
1/2 cup mini marshmallows
1/4 cup crushed graham crackers
2 tbsp melted butter
1/4 cup sugar
1 tsp cinnamon
Instructions
1. Flatten each slice of bread with a rolling pin until thin.
2. Spread a layer of chocolate on each slice.
3. Sprinkle mini marshmallows and crushed graham crackers evenly.
4. Roll up tightly and press to seal the edge.
5. Mix sugar and cinnamon in a shallow dish.
6. Brush each roll-up with melted butter and roll in cinnamon sugar.
7. Place seam-side down in a nonstick skillet over medium heat.
8. Toast on all sides until golden brown and crispy, about 5–7 minutes.
9. Let cool slightly before serving. Enjoy warm!
Notes
Swap chocolate chips for Nutella or peanut butter for fun variations.
Best served fresh, but can be reheated in an air fryer or oven for a crispy finish.
Great for kids’ sleepovers, parties, or last-minute desserts.
Why You’ll Love These S’mores Roll-Ups
Perfect for Any Occasion
These S’mores Roll-Ups have become my go-to dessert for practically everything—from casual weeknight treats to birthday parties. The versatility is unmatched! I’ve served them at summer pool parties (no campfire needed) and winter movie nights when we’re craving something warm and sweet. Kids absolutely devour them, but I’ve noticed adults sneaking seconds just as often. The best part? They take just minutes to prepare, which means less time in the kitchen and more time enjoying the company of friends and family. The crispy exterior giving way to that gooey, melty center creates an irresistible texture contrast.
Simple Ingredients, Spectacular Results
What I adore most about these S’mores Roll-Ups is how they transform basic pantry staples into something magical. You’ll only need five ingredients: flour tortillas, butter, graham cracker crumbs, chocolate chips, and marshmallows. That’s it! No special equipment or hard-to-find items. I always keep these ingredients on hand for dessert emergencies (yes, those are real in my house!). The graham cracker coating gives that authentic s’mores flavor while the tortillas provide the perfect vehicle for all that melty goodness. The simplicity means even my youngest helpers can assist with assembly, making it a fun family cooking activity.
Essential Tips & Tricks
Perfecting the Roll
The secret to perfect S’mores Roll-Ups is all in the technique. Start with room temperature tortillas—cold ones will crack when you try to roll them. I like to warm them briefly in the microwave (about 10 seconds) to make them super pliable. When filling, less is actually more! Too many chocolate chips or marshmallows will cause messy overflow.
Place your fillings in a line slightly off-center, leaving about an inch of space at each end. Roll tightly but gently, tucking in the ends as you go. The butter coating not only helps with browning but also seals the edges beautifully. If you’re making gluten-free double chocolate cookies for someone with dietary restrictions, you can adapt these using gluten-free tortillas too!
Cooking Methods for Perfect Results
While I typically pan-fry these roll-ups for the quickest results, you have options! For pan-frying, use medium heat and rotate frequently for even browning. Watch carefully—they go from golden to burnt in seconds! The air fryer is my second favorite method: 375°F for 3-4 minutes creates perfectly crispy exteriors. For larger batches, try baking at 350°F for 5-7 minutes, then broiling for 30 seconds to get that toasted marshmallow effect. Whichever method you choose, let them rest for 1-2 minutes before serving—the filling is molten lava hot! This brief cooling allows the chocolate to set slightly while still maintaining that irresistible gooey center.
Serving Ideas & Creative Variations
Dipping Sauces & Garnishes
Elevate your S’mores Roll-Ups with creative dipping options that take them to the next level! My family’s favorite is a simple chocolate ganache—just warm equal parts heavy cream and chocolate chips until smooth. For a fruity twist, try raspberry sauce or strawberry syrup that cuts through the sweetness beautifully. Caramel sauce adds a decadent touch that reminds me of those fancy chocolate marshmallow swirl cookies we all love! Don’t forget garnishes: a light dusting of powdered sugar, a sprinkle of extra graham cracker crumbs, or even some crushed freeze-dried strawberries adds visual appeal and flavor complexity. For special occasions, I serve them on a platter with small ramekins of different dips.
Flavor Twists Worth Trying
While classic s’mores flavors are unbeatable, these roll-ups are perfect for experimentation! Replace milk chocolate with white chocolate and add crushed freeze-dried raspberries for a fruity variation. Peanut butter lovers will go wild for a thin layer of peanut butter with dark chocolate chips. During fall, I add a pinch of pumpkin pie spice to the graham mixture for a seasonal twist. Mint chocolate chips create a refreshing after-dinner treat. For an adult version, try adding a tiny sprinkle of flaky sea salt or cayenne for a sweet-heat combination. My personal favorite variation includes a thin layer of Nutella with the marshmallows—it’s ridiculously good and reminds me of European hazelnut treats.
Storage & Troubleshooting Guide
Making Ahead & Reheating
S’mores Roll-Ups are best enjoyed fresh and warm, but I understand the need to plan ahead! You can prepare them up to the rolling stage and refrigerate for up to 24 hours before cooking. Just keep them tightly wrapped to prevent drying out. For leftovers (though we rarely have any!), store at room temperature for up to 12 hours in an airtight container. To reheat, avoid the microwave which makes them soggy—instead, use a dry skillet over medium-low heat for 1-2 minutes per side. The air fryer also works wonderfully for reheating at 350°F for just 1 minute. The texture won’t be identical to fresh-made, but they’ll still satisfy that s’mores craving!
Fixing Common Problems
Even the simplest recipes can sometimes go awry! If your roll-ups are leaking filling, you likely overfilled or didn’t seal the edges properly. Try using less filling next time and brush the edges with extra butter before rolling. For soggy centers, your heat was probably too high—the outside browned before the inside could warm through. Lower your heat and cook more slowly. If graham coating falls off during cooking, make sure your butter layer is even and slightly tacky before adding the crumbs. And if your marshmallows aren’t melty enough, try cutting them into smaller pieces or using mini marshmallows which melt faster. Remember that patience is key—rushing the cooking process almost always leads to disappointing results.
Frequently Asked Questions
Can I make S’mores Roll-Ups ahead of time?
Yes! You can prepare them up to the rolling stage and refrigerate for 24 hours. Cook them fresh when ready to serve for the best texture and that warm, gooey center.
What’s the best type of tortilla to use?
Medium-sized (8-inch) flour tortillas work best. They’re thin enough to crisp nicely but sturdy enough to hold the fillings without tearing.
Can I make these in the oven instead of a pan?
Absolutely! Bake at 350°F for 5-7 minutes until golden, then broil for 30 seconds to toast the marshmallow filling. Watch carefully to prevent burning.
Are S’mores Roll-Ups suitable for a crowd?
They’re perfect for parties! You can make a large batch in advance and finish them in batches as needed. They cook quickly and are easy to serve.
How do I prevent my S’mores Roll-Ups from opening while cooking?
Secure them with toothpicks before cooking, or place them seam-side down first in the pan to seal the edge before flipping to cook all sides.
Final Thoughts
S’mores Roll-Ups have become a beloved tradition in my home—the perfect balance of nostalgic campfire flavors in a convenient, customizable package. What makes them truly special is how they bring people together; there’s something magical about watching faces light up when that first crispy, gooey bite hits the taste buds. Whether you’re making them for a special occasion or just because it’s Tuesday, these treats create moments worth savoring. For more delicious inspiration, check out my Pinterest board where I’m always adding new twists on classic favorites!