

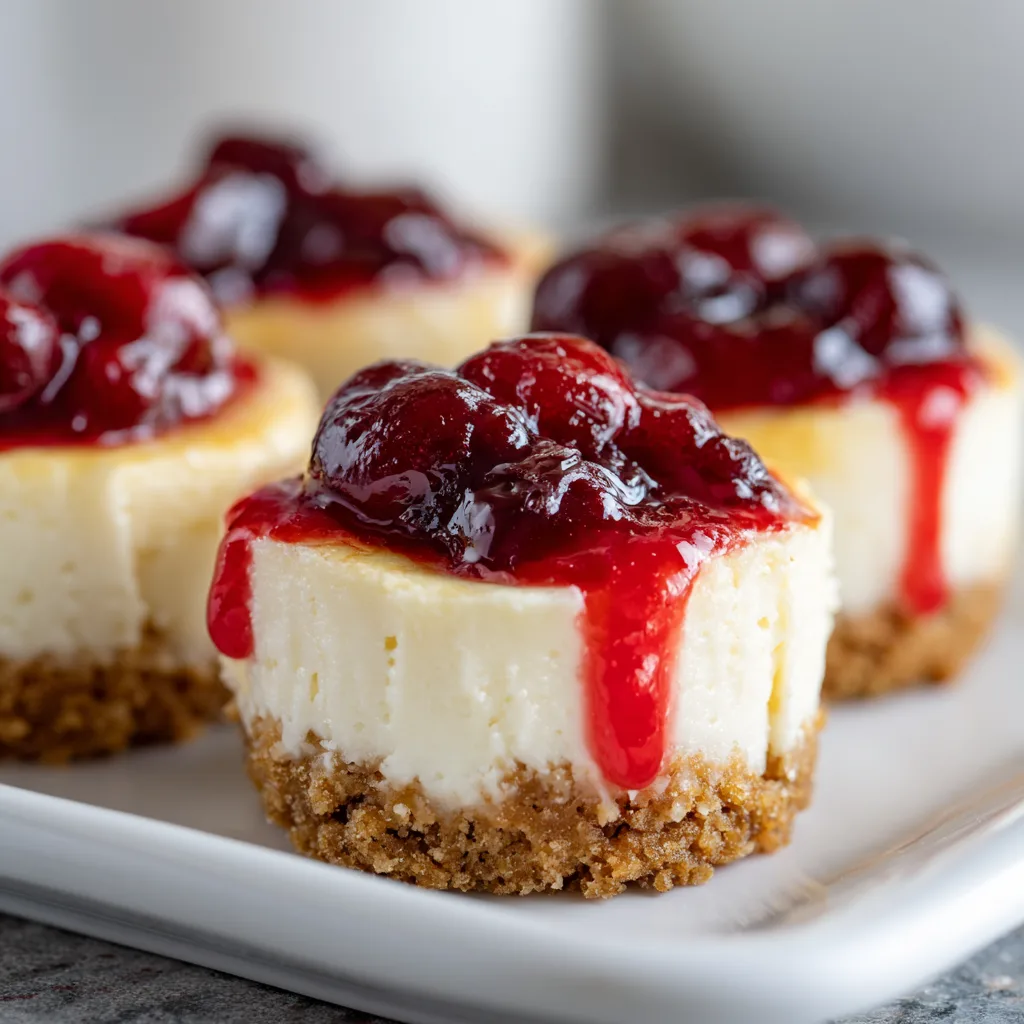
These Mini Cherry Cheesecakes are the perfect bite-sized indulgence that brings together buttery graham cracker crusts, creamy cheesecake filling, and sweet cherry topping. I’ve been making these adorable treats for years, and they never fail to impress at gatherings. The individual portions make them ideal for serving at parties, and the vibrant red cherry topping creates a gorgeous pop of color. Best of all, they’re much simpler to make than a traditional full-sized cheesecake, with no water bath required!
Table of Contents
Recipe
Print
Delicious Mini Cherry Cheesecakes Recipe | Easy & Creamy Dessert
- Prep Time: 15 minutes
- Cook Time: 20 minutes
- Total Time: 35 minutes
- Yield: 12 mini cheesecakes
- Category: Dessert
- Method: Baked
- Cuisine: American
- Diet: Vegetarian
Description
These Delicious Mini Cherry Cheesecakes are creamy, smooth, and topped with sweet cherry pie filling for a simple yet elegant dessert. Made with a buttery graham cracker crust and a rich cheesecake center, they’re the perfect treat for any occasion!
Ingredients
Crust:
1 cup graham cracker crumbs
2 tablespoons granulated sugar
4 tablespoons melted butter
Cheesecake Filling:
16 ounces cream cheese, softened
1/2 cup granulated sugar
2 large eggs
1 teaspoon vanilla extract
1/4 cup sour cream
Topping:
1 can (21 ounces) cherry pie filling
Optional: fresh mint leaves for garnish
Instructions
1. Preheat oven to 325°F (160°C). Line a 12-cup muffin tin with paper liners.
2. In a bowl, combine graham cracker crumbs, sugar, and melted butter. Mix until evenly coated.
3. Divide mixture evenly among muffin cups and press firmly into the bottom using the back of a spoon.
4. In a separate large bowl, beat cream cheese and sugar together until smooth and fluffy.
5. Add eggs one at a time, beating after each addition. Mix in vanilla and sour cream until just combined.
6. Spoon cheesecake mixture evenly over crusts, filling each liner about 3/4 full.
7. Bake for 18–20 minutes, or until centers are just set and slightly jiggly.
8. Cool in pan for 30 minutes, then refrigerate for at least 2 hours or until chilled.
9. Top each mini cheesecake with a spoonful of cherry pie filling before serving.
Notes
For a crispier crust, pre-bake the graham base for 5 minutes before adding the filling.
You can use blueberry, strawberry, or raspberry topping instead of cherry.
Make ahead! These mini cheesecakes can be refrigerated up to 3 days or frozen for up to 2 months.
For extra creaminess, let cream cheese come fully to room temperature before mixing.
Why You’ll Love These Mini Cherry Cheesecakes
Perfect Portion Control
These bite-sized cheesecakes are the ultimate solution for dessert lovers who want just the right amount of sweetness. Each mini cheesecake delivers that creamy, tangy flavor you crave without committing to a full slice. I love how they bake up perfectly in a standard muffin tin, creating individual servings that are ideal for gatherings. The portable nature makes them perfect for potlucks, baby showers, or holiday dessert tables. Plus, the graham cracker crust provides that satisfying crunch against the silky filling.
Make-Ahead Convenience
One of my favorite things about these mini cheesecakes is how beautifully they store in the refrigerator. You can make them up to three days ahead, which is a lifesaver when planning parties or holiday gatherings. The flavors actually develop and meld together over time, making them taste even better the next day. I often prepare the cheesecakes and cherry topping separately, then assemble just before serving for the freshest presentation. This make-ahead capability takes so much pressure off when entertaining!
Essential Tips & Tricks
Perfect Cheesecake Texture
The secret to silky-smooth cheesecakes starts with room temperature ingredients. Cold cream cheese will leave lumps that never fully incorporate! I always set my cream cheese, eggs, and sour cream on the counter for at least an hour before mixing. Another game-changer is mixing at low speed to prevent incorporating too much air, which causes cracks. For that perfect creamy texture, don’t overbake—they should still have a slight jiggle in the center when you remove them from the oven. The gentle cooling method makes all the difference.
Preventing Common Pitfalls
The most common issue with mini cheesecakes is overbaking, which leads to dry, cracked tops. I always set my timer for 2 minutes less than the recipe calls for, then check frequently. Another trick is to run a thin knife around the edges immediately after baking to prevent the cheesecakes from sticking to the pan as they cool and contract. For the crust, pressing firmly with the back of a measuring spoon creates that perfect compact base. If you notice your cheesecakes starting to crack, turn off the oven and let them cool gradually with the door slightly ajar.
Serving Ideas & Creative Variations
Seasonal Toppings
While the classic cherry topping is divine, these mini cheesecakes become a year-round treat with seasonal variations. In summer, I love topping them with fresh berries tossed in a bit of sugar to create a natural syrup. Fall brings opportunities for apple-cinnamon compote or pumpkin-spiced whipped cream. Winter holidays call for cranberry sauce with orange zest or crushed peppermint with chocolate drizzle. The neutral cheesecake base pairs beautifully with nearly any flavor profile. For an elegant touch, add a small sprig of mint or a dusting of powdered sugar just before serving.
Flavor Twists
The basic cheesecake batter is like a blank canvas ready for your creative touches. I love adding flavor infusions like vanilla bean paste instead of extract for those gorgeous flecks, or a tablespoon of lemon zest for brightness. For chocolate lovers, fold in mini chocolate chips or swirl in melted chocolate before baking. Spice variations like cardamom, cinnamon, or even a touch of cayenne create unexpected delights. The crust offers opportunities too—try chocolate cookie crumbs, gingersnaps, or crushed pretzels for a sweet-salty combination that perfectly complements the creamy filling.
Storage & Troubleshooting Guide
Proper Storage Methods
These mini cheesecakes maintain their fresh flavor when properly stored. After they’ve completely cooled, place them in an airtight container in the refrigerator for up to 5 days. I like to place a sheet of parchment between layers if stacking is necessary. For longer storage, these freeze beautifully for up to 3 months! Wrap each individual cheesecake in plastic wrap, then place in a freezer bag. When ready to serve, thaw overnight in the refrigerator, then add toppings. The texture remains remarkably creamy, and guests will never guess they weren’t freshly made.
Fixing Common Issues
If your cheesecakes sink in the middle, don’t worry—this creates the perfect well for your cherry topping! But to prevent this next time, avoid overmixing your batter, which incorporates too much air. For cracked tops, a lower baking temperature and the proper cooling method will help. If your crust is crumbly, try adding an extra tablespoon of melted butter next time. Too-soft cheesecakes usually indicate underbaking—look for that slight jiggle in the center, not a liquid middle. Remember that cheesecakes firm up considerably during cooling.
Frequently Asked Questions
Can I make Mini Cherry Cheesecakes without a muffin tin?
Absolutely! Silicone cupcake liners on a baking sheet work perfectly. You can also use small ramekins, though you may need to adjust baking time slightly for different-sized containers.
How do I know when my mini cheesecakes are done baking?
Look for set edges with a slight jiggle in the center when gently shaken. They’ll continue to firm up while cooling. Overbaking leads to cracks and dry texture.
Can I use fresh cherries instead of canned cherry topping?
Yes! Cook 2 cups pitted fresh cherries with 1/4 cup sugar and 1 tablespoon lemon juice until thickened. Cool completely before topping your mini cheesecakes.
Why did my mini cheesecakes crack?
Cracks usually result from temperature shock or overbaking. Cool gradually in the turned-off oven with the door ajar, then at room temperature before refrigerating.
Can I make these Mini Cherry Cheesecakes gluten-free?
Definitely! Use gluten-free graham crackers or cookies for the crust. The filling is naturally gluten-free, but always check your vanilla extract and cherry topping ingredients.
Final Thoughts
These Mini Cherry Cheesecakes have become my signature dessert for good reason—they’re approachable enough for baking beginners yet impressive enough for special occasions. The contrast between the creamy filling, buttery crust, and sweet-tart cherry topping creates a perfect balance of flavors and textures. I love seeing guests’ eyes light up when they spot these little treats on the dessert table! For more delicious recipes and baking inspiration, visit my Pinterest collection where I’m always adding new ideas.