

Gingerbread Truffles melt in your mouth with warm, spiced holiday magic in every bite. The moment I created these little gems, my kitchen filled with that unmistakable aroma of ginger, cinnamon, and molasses that instantly transports you to cozy December evenings. There’s something utterly enchanting about the way these truffles combine the nostalgic flavor of classic gingerbread cookies with the luxurious, velvety texture of chocolate ganache. I’ve always believed the best holiday treats should be both impressive and simple, and these Gingerbread Truffles deliver on both counts. Perfect for gift-giving, holiday gatherings, or those quiet moments when you need a little festive pick-me-up with your afternoon coffee.
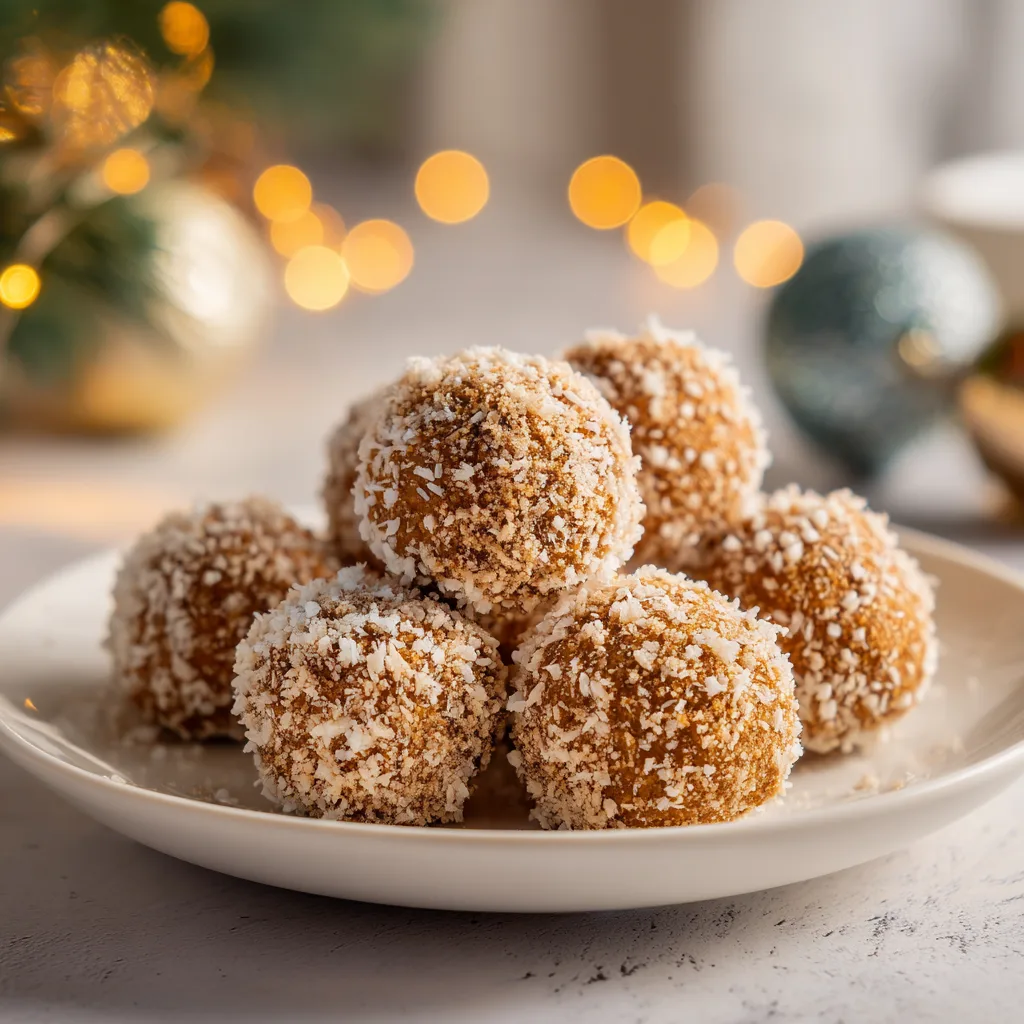
Table of Contents
Recipe
Print
Delicious Gingerbread Truffles Recipe | Easy Holiday Dessert Treats
- Prep Time: 15 minutes
- Cook Time: 0 minutes
- Total Time: 35 minutes (including chill time)
- Yield: 20 truffles
- Category: Dessert
- Method: No-Bake
- Cuisine: American
- Diet: Vegetarian
Description
These Gingerbread Truffles are soft, spiced, and coated in white chocolate—made from crushed cookies and cream cheese. A festive no-bake treat that tastes like Christmas in every bite.
Ingredients
24 gingerbread or gingersnap cookies, crushed
4 oz cream cheese, softened
1/2 teaspoon ground cinnamon
1/4 teaspoon ground ginger
Pinch of nutmeg
10 oz white chocolate or almond bark, melted
Optional: holiday sprinkles for topping
Instructions
1. In a food processor, pulse cookies into fine crumbs.
2. Add cream cheese and spices. Blend until mixture forms a thick dough.
3. Scoop and roll into 1-inch balls. Place on a parchment-lined tray.
4. Freeze for 20 minutes until firm.
5. Melt white chocolate in microwave-safe bowl, stirring until smooth.
6. Dip truffles in melted chocolate and place back on tray.
7. Immediately top with holiday sprinkles if using.
8. Chill until chocolate is set. Store in refrigerator.
Notes
Use gingersnaps for a crispier texture, or soft gingerbread for chewier bites.
Add a splash of molasses for extra depth.
These keep for 1 week in the fridge or 2 months in the freezer.
Why You’ll Love This Gingerbread Truffles
The Perfect Balance of Spice and Sweetness
When it comes to holiday treats, finding that perfect harmony between warm spices and sweetness can be tricky. Too much spice overwhelms; too little leaves you wanting more. These Gingerbread Truffles nail that balance perfectly. I remember the first time I tested this recipe, nervously watching my spice-skeptical nephew take a bite. His eyes widened, and he immediately reached for another!
The secret lies in the careful blend of ground ginger, cinnamon, nutmeg, and a hint of cloves that infuse every truffle with authentic gingerbread flavor. The molasses adds that characteristic deep sweetness without becoming cloying. What I love most is how the spices complement the chocolate coating rather than competing with it. Each bite delivers that quintessential gingerbread flavor profile that makes you feel like you’re enjoying a traditional cookie but in an elevated, melt-in-your-mouth form. Even those who typically shy away from heavily spiced desserts find these truffles irresistibly approachable.
Quick, No-Bake Holiday Convenience
During the holiday season, my oven works overtime with cookies, cakes, and pies. That’s why I absolutely treasure recipes like these Gingerbread Truffles that don’t require any baking at all. You can whip these up while your oven is occupied with other holiday baking projects or when you simply don’t want to generate extra heat in the kitchen.
The hands-on time is surprisingly minimal – just about 20 minutes to prepare the filling and another 15 minutes to dip them in chocolate. The rest is just chilling time, during which you can wrap presents, decorate, or prepare other dishes.
I’ve made these truffles at midnight before a holiday party when I realized I needed one more dessert, and they were ready to go by morning! They’re also wonderfully make-ahead friendly, actually improving in flavor after a day or two as the spices meld together. When holiday chaos threatens to overwhelm, having a sophisticated, impressive dessert that comes together without fuss is nothing short of a Christmas miracle – just like my Christmas Tree Cake Truffles that always disappear first at holiday gatherings.
Essential Tips & Tricks
Mastering the Perfect Truffle Texture
The difference between an ordinary truffle and an exceptional one often comes down to texture. For these Gingerbread Truffles, achieving that perfect melt-in-your-mouth consistency is crucial. I learned this the hard way during my first attempt when my filling was too soft and refused to hold its shape. The key is getting the right balance of moisture in your gingersnap cookie crumbs.
Start with completely cool, crisp gingersnap cookies and pulse them into fine crumbs in your food processor. If your crumbs are uneven or too coarse, your truffles will have an inconsistent texture. When mixing with the cream cheese, work gradually – you can always add more moisture, but you can’t take it away.
The perfect truffle mixture should hold together when pressed between your fingers but shouldn’t be sticky or wet. If your mixture feels too dry, add a teaspoon of cream cheese at a time. Too wet? Add more cookie crumbs. Temperature matters too – chilling the mixture for at least 30 minutes before rolling makes handling infinitely easier. For even more truffle inspiration, check out my Blue Christmas Truffles which use a similar technique with a different flavor profile.
Chocolate Coating Secrets for Professional Results
The chocolate coating can make or break your truffles, both in appearance and taste. I’ve had my share of chocolate-coating disasters – from seized chocolate to bloomy, streaky finishes. Here’s what I’ve learned works flawlessly every time. First, choose high-quality chocolate that you enjoy eating on its own. For Gingerbread Truffles, I prefer semi-sweet chocolate as it balances the sweetness of the filling, but white chocolate creates a stunning visual contrast.
For the smoothest coating, proper melting is essential. Always chop your chocolate into small, uniform pieces before melting. Use a double boiler or microwave in 30-second increments at 50% power, stirring between each interval. Adding a tablespoon of coconut oil or shortening to your melted chocolate creates a thinner coating that’s easier to work with and sets with a beautiful shine.
Keep your rolled truffle centers very cold before dipping – I place mine in the freezer for 10 minutes right before coating. This helps the chocolate set quickly and prevents the centers from melting into the warm chocolate. For the cleanest results, use a dipping fork or two regular forks to lower each truffle center into the chocolate, allowing excess to drip off before placing on parchment paper.
Serving Ideas & Creative Variations
Festive Presentation Techniques
The way you present these Gingerbread Truffles can elevate them from simple treats to showstopping holiday centerpieces. I learned this at last year’s holiday party when my plainly served truffles were overlooked until I rearranged them on a tiered stand with decorative elements. The transformation was immediate – suddenly everyone was reaching for them!
For gift-giving, place truffles in mini cupcake liners and arrange them in a beautiful box tied with ribbon. The individual wrappers prevent sticking and make them look professionally crafted. For a holiday dessert table, create a truffle tower by arranging them in a cone shape on a cake stand, dusting lightly with powdered sugar to mimic snow. Add small sprigs of rosemary between layers to suggest pine branches.
Another stunning presentation is to serve them alongside my Slow Cooker Gingerbread Pudding Cake for a themed dessert experience that will have guests raving. For an elegant touch, place a single truffle on each dessert plate alongside a small cup of coffee or hot chocolate. Don’t forget the power of contrast – the dark chocolate-coated truffles look magnificent against white serving pieces, while white chocolate-coated versions pop against dark plates.

Exciting Flavor Twists on the Classic Recipe
While the classic Gingerbread Truffles are divine, experimenting with variations keeps this recipe fresh and exciting year after year. One of my favorite adaptations came about by accident when I ran out of regular cream cheese and substituted mascarpone – the resulting truffles had an incredibly luxurious, silky texture that my guests couldn’t stop talking about.
For an orange-gingerbread variation, add the zest of one orange to your truffle mixture – the bright citrus notes beautifully complement the warm spices. Coffee lovers will appreciate a mocha-gingerbread version: dissolve 1 tablespoon of espresso powder in 1 teaspoon of hot water and add to the mixture for a sophisticated flavor profile. For a boozy adult version, add 1-2 tablespoons of bourbon, rum, or spiced liqueur to the filling. The alcohol enhances the spices while adding complexity.
White chocolate coating can be flavored with peppermint extract for a refreshing contrast to the gingerbread, similar to the technique I use in my 5-ingredient Peppermint Mocha Fudge. For texture variations, try rolling the finished truffles in crushed candied ginger, toasted pecans, or even crushed gingerbread cookies before the chocolate sets completely. Each variation maintains the essence of gingerbread while offering a new experience.
Storage & Troubleshooting Guide
Keeping Truffles Fresh for Maximum Enjoyment
Proper storage is crucial for maintaining the perfect texture and flavor of your Gingerbread Truffles. I learned this the hard way after making a large batch for a holiday open house, only to find they’d lost their luster by the time guests arrived. Now I follow a precise storage protocol that keeps them perfect for days.
For short-term storage (up to 5 days), place your fully set truffles in an airtight container, separating layers with parchment paper to prevent sticking. Store in the refrigerator, but here’s the important part: always bring them to room temperature before serving. Cold truffles don’t release their full flavor profile, and the texture is compromised. Allow 20-30 minutes for them to come to room temperature for the best tasting experience.
For longer storage (up to 3 weeks), these truffles freeze beautifully. Place them in a single layer on a baking sheet until frozen solid, then transfer to a freezer-safe container with parchment between layers. When ready to enjoy, thaw them overnight in the refrigerator, then bring to room temperature before serving. Avoid storing truffles in humid environments or near strong-smelling foods, as the chocolate can absorb odors and moisture.
Solving Common Truffle-Making Challenges
Even experienced bakers encounter occasional challenges with truffles. Over the years, I’ve faced and overcome most common issues, and I’m happy to share these solutions. If your truffle mixture is too sticky to roll, it likely needs more cookie crumbs or additional chilling time. Pop it back in the refrigerator for 30 minutes, or add gingersnap crumbs one tablespoon at a time until it reaches a moldable consistency.
When chocolate coating cracks or looks dull, temperature is usually the culprit. If your kitchen is too cold, the chocolate sets too quickly and can crack as the filling expands slightly at room temperature. Work in a moderately warm room and add a bit more coconut oil to your chocolate for flexibility. Conversely, if your kitchen is very warm, the centers may soften too much before dipping. In this case, work with smaller batches, keeping the remainder refrigerated until ready to dip. For chocolate that develops white streaks (bloom), it was likely overheated or experienced temperature fluctuations. Always melt chocolate gently and store finished truffles at a consistent temperature.
If your truffles are oddly shaped, try using a small cookie scoop for uniformity, then roll quickly between your palms. For truffles that flatten on the bottom while setting, place them on a parchment-lined egg carton that will cradle each one perfectly as the chocolate sets. With these troubleshooting tips, you’ll be able to create professional-looking Gingerbread Truffles every time.
Frequently Asked Questions
Can I make Gingerbread Truffles without cream cheese?
Yes! If you prefer not to use cream cheese, there are several alternatives. Mascarpone creates an exceptionally rich truffle with a subtle flavor that complements the gingerbread beautifully. For dairy-free options, try coconut cream (the solid part from a can of coconut milk) or dairy-free cream cheese. The key is ensuring your binding agent has enough fat content to create that smooth, creamy texture that makes these Gingerbread Truffles so irresistible.
How far in advance can I make these truffles for a holiday party?
These truffles are perfect for make-ahead preparations! You can make them up to 3 days in advance and store in the refrigerator, or up to 3 weeks ahead if frozen. In fact, the flavors actually develop and improve after 24 hours as the spices meld together. Just be sure to bring them to room temperature before serving for the best texture and flavor experience.
What’s the best chocolate to use for dipping the truffles?
High-quality chocolate makes all the difference in these Gingerbread Truffles. I recommend using chocolate bars rather than chips, as chips contain stabilizers that can affect melting quality. For dark coating, choose a semi-sweet or bittersweet chocolate with 55-70% cacao. White chocolate creates a beautiful contrast with the spiced filling, while milk chocolate offers a sweeter, more approachable option. Whatever you choose, use chocolate you’d enjoy eating on its own.
Can I use store-bought gingerbread cookies instead of gingersnaps?
Absolutely! Store-bought gingerbread cookies work wonderfully in this recipe. The key is ensuring they’re crisp rather than soft and chewy. If your gingerbread cookies are on the softer side, you can crisp them up by placing them in a 300°F oven for 5-10 minutes, then cooling completely before processing. This helps achieve the proper texture for your truffle mixture.
What are the best toppings to decorate Gingerbread Truffles?
The decoration possibilities for Gingerbread Truffles are endless! For a simple elegant look, drizzle with contrasting chocolate (white over dark or vice versa). For more festive options, try crushed candy canes, gold or silver sprinkles, or finely chopped crystallized ginger. Tiny gingerbread men sprinkles create an adorable themed look. Add decorations immediately after dipping each truffle while the chocolate is still wet so they adhere properly.
Final Thoughts
These Gingerbread Truffles have become more than just a recipe in my holiday collection – they’re a tradition that signals the season has truly begun. There’s something magical about the way their spicy-sweet aroma fills my kitchen and how their rich, complex flavors capture the essence of holiday baking in just one bite. What I treasure most is their ability to bring people together – whether it’s family gathering around the kitchen island to help roll and dip, friends exclaiming over that first taste, or the joy on someone’s face when they receive a beautifully packaged box of these handcrafted treats.
The beauty of these Gingerbread Truffles lies in their versatility and approachability. They’re sophisticated enough for elegant holiday gatherings yet simple enough for baking novices to master. They honor traditional gingerbread flavors while offering a fresh, contemporary presentation that appeals to all generations. I encourage you to make these truffles your own – experiment with the coatings, play with decorations, and perhaps start your own tradition of sharing them with loved ones. After all, the most precious holiday memories often center around the treats we create with love and share generously. I’d love to see your creations if you make these – tag me on Pinterest to share your Gingerbread Truffles!