

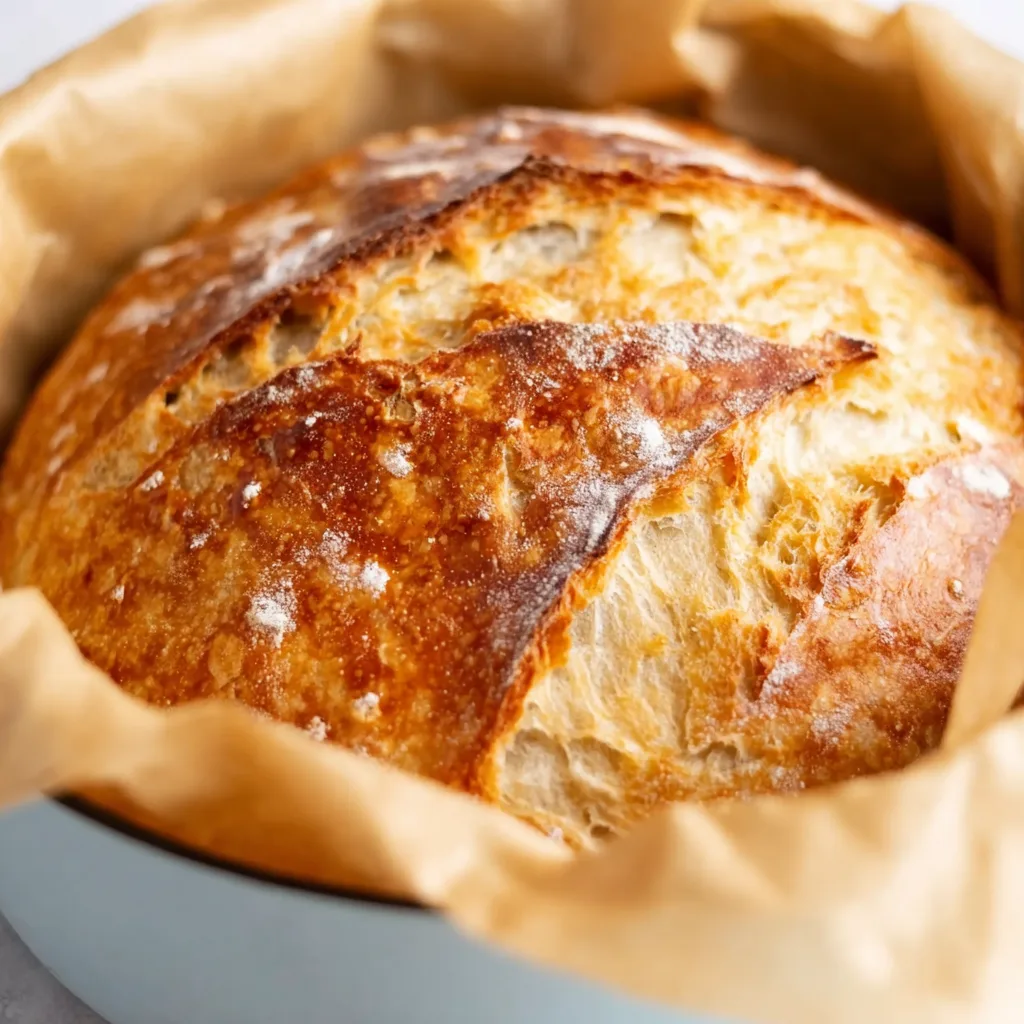
There’s something magical about Dutch oven no knead crusty bread that transforms even the most hesitant baker into a confident artisan. The first time I pulled that golden, crackling loaf from my oven, I actually gasped—that perfect crust giving way to a tender, airy interior was nothing short of miraculous. What makes this recipe so special is its beautiful simplicity: just flour, water, salt, and yeast, transformed through time rather than effort. The Dutch oven creates the perfect environment, trapping steam to develop that bakery-worthy crust we all crave. If you’ve been intimidated by bread-making, this forgiving method is your gateway to homemade bread bliss.
Table of Contents
Recipe
Print
Easy Dutch Oven No-Knead Crusty Bread Recipe
- Prep Time: 10 minutes
- Cook Time: 45 minutes
- Total Time: 13 hours
- Yield: 1 loaf
- Category: Bread
- Method: Baking
- Cuisine: American
- Diet: Vegetarian
Description
This easy Dutch oven no-knead crusty bread recipe creates a perfectly golden, crisp crust with a soft, airy interior using simple ingredients and minimal effort.
Ingredients
3 cups all-purpose flour
1 1/2 teaspoons salt
1/2 teaspoon instant yeast
1 1/2 cups warm water
Instructions
1. In a large bowl, mix flour, salt, and yeast.
2. Add warm water and stir until a shaggy dough forms.
3. Cover the bowl with plastic wrap or a towel.
4. Let dough rest at room temperature for 12 to 18 hours.
5. Preheat oven to 450°F with a Dutch oven inside.
6. Turn dough onto a floured surface and shape into a ball.
7. Place dough on parchment paper.
8. Carefully transfer dough into the hot Dutch oven.
9. Cover with lid and bake for 30 minutes.
10. Remove lid and bake for another 10 to 15 minutes until golden brown.
11. Remove bread and let cool before slicing.
Notes
Do not skip resting time for best texture.
Use a well-floured surface to prevent sticking.
Handle hot Dutch oven carefully.
Let bread cool fully before slicing for best results.
Why You’ll Love This Dutch Oven No Knead Crusty Bread
Foolproof for Beginners
This bread requires virtually zero technique or special skills—just patience. Unlike traditional methods that demand precise kneading and timing, this dough develops gluten through a long, slow fermentation. I love how forgiving it is; even when I’ve forgotten about it for an extra hour or two, it still turns out beautifully. The magic happens in the Dutch oven, which mimics professional steam-injected ovens. The heavy lid traps moisture from the dough, creating the perfect environment for that crackling crust. It’s genuinely impossible to mess up if you follow the basic timing.
Incredible Flavor Development
The extended fermentation (18-24 hours) is where this bread develops its complex flavor profile. Those extra hours allow natural enzymes to break down starches into sugars, creating depth that quick breads simply can’t match. I’ve found the longer rise produces subtle sourdough-like notes without needing a starter. The slow fermentation also improves digestibility—several friends with mild gluten sensitivities have told me they can enjoy this bread without discomfort. Plus, the texture contrast between that shattering crust and pillowy interior creates a sensory experience that’s utterly satisfying.
Essential Tips & Tricks
Getting the Perfect Crust
The secret to that bakery-quality crust lies in three factors: proper preheating, adequate moisture, and temperature control. Always preheat your Dutch oven for at least 30 minutes at 450°F—I actually prefer 45 minutes to ensure it’s blazing hot. This immediate heat shock creates that dramatic oven spring and crust development. For an extra-crispy exterior, I sometimes remove the lid 5 minutes earlier than the recipe suggests. The final 15 minutes of uncovered baking allows moisture to escape, resulting in that audibly crackling crust that makes cutting into the bread so satisfying.
Mastering the Dough Consistency
Finding the right dough consistency takes a little practice, but it’s worth perfecting. You’re aiming for a shaggy, wet dough that’s slightly sticky but still workable. I like to start with slightly less water than called for (about 1½ cups for 3 cups flour), then add more tablespoon by tablespoon until it reaches that sweet spot. Temperature matters too—I’ve found that using room temperature water in summer and slightly warmer water in winter helps achieve consistent results. For extra flavor, try substituting ¼ cup of the water with beer or buttermilk for a subtle tang.
Serving Ideas & Creative Variations
Perfect Pairings
This crusty bread elevates even the simplest meals into something special. I love serving thick slices alongside hearty soups like a classic tomato bisque or my favorite creamy cauliflower carrot soup—the bread is perfect for soaking up every last drop. For entertaining, I’ll often create a rustic board with olive oil for dipping, flaky sea salt, and roasted garlic. The neutral flavor profile makes it versatile enough to complement everything from cheese plates to Sunday roasts. When we have leftovers, thick-cut slices transformed into garlic bread or bruschetta disappear in minutes.
Flavor Variations
Once you’ve mastered the basic recipe, the flavor possibilities are endless. My family’s favorite variation includes 2 tablespoons of rosemary and garlic, folded in just before the second rise. For a Mediterranean twist, try adding chopped olives, sun-dried tomatoes, and a sprinkle of herbs de Provence. Whole grain enthusiasts can substitute up to one-third of the white flour with whole wheat, rye, or spelt—just increase the water slightly to compensate for the thirstier flours. For a breakfast-friendly version, fold in dried cranberries and walnuts, then serve toasted with a smear of salted butter.
Storage & Troubleshooting Guide
Keeping It Fresh
Despite having no preservatives, this bread stays remarkably fresh when stored properly. For maximum crust integrity, store your cooled bread cut-side down on a cutting board, covering only the exposed end with a clean kitchen towel. This method preserves the crust while preventing the interior from drying out too quickly. For longer storage (beyond 24 hours), I wrap the bread in a clean kitchen towel, then place it in a paper bag. Avoid plastic, which traps moisture and softens that beautiful crust. To refresh day-old bread, sprinkle with water and warm in a 350°F oven for 5-10 minutes.
Solving Common Problems
If your bread turns out dense or gummy, the most likely culprit is under-proofing or using old yeast. Test your yeast’s activity by dissolving it in warm water with a pinch of sugar—it should foam within 5-10 minutes. For a flat loaf with minimal oven spring, your Dutch oven might not be hot enough before adding the dough. Remember that preheating thoroughly is crucial. If your crust is too pale, try baking with the lid off longer or increasing your oven temperature by 25°F. For loaves that stick, a light dusting of cornmeal or rice flour on the bottom of your Dutch oven creates a natural non-stick surface.
Frequently Asked Questions
Can I use active dry yeast instead of instant?
Yes! Simply dissolve the active dry yeast in warm water first, then proceed with the recipe. You may need to add about 25% more yeast (¼ teaspoon extra) to achieve the same rise.
Why is my Dutch oven no knead crusty bread not rising properly?
Check your yeast freshness and ensure your kitchen isn’t too cold. For slow-rising dough, place it in a slightly warm oven (turned off) with a bowl of hot water for a humidity boost.
Can I refrigerate the dough to extend the fermentation?
Absolutely! After the initial 12-18 hour rise, refrigerate the dough for up to 3 days. This develops even more complex flavors and makes the timing more flexible.
What size Dutch oven works best?
A 5-6 quart Dutch oven is ideal. Smaller pots (4 quart) work but yield taller loaves, while larger ones (7+ quart) create flatter, more rustic shapes.
Can I make this bread without a Dutch oven?
While a Dutch oven produces the best crust, you can use a covered casserole dish or create steam by placing a pan of hot water on the bottom rack while baking on a stone.
Final Thoughts
This Dutch oven no knead crusty bread has become my signature recipe—the one friends always request and family expects at gatherings. Its forgiving nature makes it accessible to everyone, while the results rival artisan bakeries. The minimal hands-on time belies the incredible flavor and texture you’ll achieve. I find there’s something deeply satisfying about transforming such simple ingredients into something so extraordinary. Whether you’re a seasoned baker or complete novice, this method delivers consistent, impressive results that will have everyone thinking you’ve been hiding professional baking skills all along.
Find more delicious recipes on Pinterest!