


Crispy Homemade Chicken Spring Rolls are my absolute favorite way to bring restaurant-quality Asian appetizers into my kitchen. There’s something magical about that first crunch when you bite through the perfectly golden wrapper to reveal steaming, savory filling inside. I’ve spent years perfecting this recipe, playing with different fillings and frying techniques until I found the perfect balance. These spring rolls are packed with tender chicken, crisp vegetables, and aromatic seasonings that will transport you straight to your favorite Asian restaurant. Trust me, once you master these at home, you’ll never go back to takeout!
Table of Contents
Recipe
Print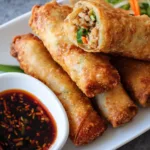
Crispy Homemade Chicken Spring Rolls Recipe | Easy & Delicious Appetizer
- Prep Time: 20 minutes
- Cook Time: 15 minutes
- Total Time: 35 minutes
- Yield: 12 spring rolls
- Category: Appetizer, Snack
- Method: Frying
- Cuisine: Asian-Inspired
Description
These crispy homemade chicken spring rolls are packed with tender shredded chicken, crunchy veggies, and savory seasonings—all rolled into golden perfection. Serve them hot with your favorite dipping sauce for an irresistible appetizer or snack!
Ingredients
1 tbsp sesame oil or vegetable oil
2 cups cooked shredded chicken (rotisserie works great!)
1 cup shredded cabbage or coleslaw mix
1/2 cup shredded carrots
2 green onions, thinly sliced
2 cloves garlic, minced
1 tbsp soy sauce
1 tsp grated ginger
Salt & pepper, to taste
12 spring roll wrappers
1 egg, beaten (for sealing)
Oil for frying
Optional Dipping Sauce:
1/4 cup soy sauce
1 tbsp rice vinegar
1 tsp sesame oil
1/2 tsp chili flakes or chili garlic sauce
Instructions
1. Heat sesame oil in a skillet over medium heat. Add garlic and ginger, sauté 1 minute.
2. Add chicken, cabbage, carrots, green onions, soy sauce, salt, and pepper. Stir-fry 2–3 minutes until combined and heated through. Cool filling slightly.
3. Lay out a spring roll wrapper. Add 2–3 tbsp filling near the bottom. Fold up from the bottom, tuck in sides, and roll tightly. Seal with beaten egg.
4. Repeat with remaining wrappers.
5. Heat oil in a pan (350°F). Fry spring rolls in batches until golden and crispy, about 3–4 minutes per side. Drain on paper towels.
6. Whisk together dipping sauce ingredients and serve spring rolls hot with sauce.
Notes
• Bake at 400°F for 20 minutes if you prefer a lighter option.
• Air fryer method: 390°F for 10–12 minutes, flipping halfway.
• Great for freezing before frying—freeze flat in a single layer.
Why You’ll Love These Crispy Homemade Chicken Spring Rolls
Perfect Texture Combination
The contrast of textures in these spring rolls is what makes them truly special. The wrappers fry up to a delicate, shattering crispness that gives way to a filling with the perfect amount of moisture. I’ve found that finely chopping the cabbage, carrots, and chicken creates that ideal filling consistency – not too wet (which would make soggy rolls) and not too dry. When you take that first bite, you’ll experience the most satisfying crunch followed by the tender, flavorful filling. It’s that textural journey that makes these spring rolls completely addictive and keeps everyone reaching for more.
Make-Ahead Convenience
One of my favorite things about these spring rolls is their meal prep potential. You can prepare the filling up to two days ahead and store it in the refrigerator, which allows the flavors to develop even more deeply. The rolls themselves can be assembled and refrigerated for several hours before frying, making them perfect for entertaining. I love setting up a rolling station and getting my family involved – it becomes a fun kitchen activity rather than a cooking chore. When guests arrive, all I need to do is heat the oil and fry them up for that fresh-from-the-kitchen experience.
Essential Tips & Tricks
Wrapper Selection & Handling
Choosing the right wrappers is crucial for achieving that perfect crisp exterior. Look specifically for spring roll wrappers (sometimes labeled as “spring roll pastry”) rather than egg roll wrappers, which are thicker. Keep them covered with a slightly damp cloth while you work to prevent drying out. When rolling, ensure you’re wrapping tightly enough to prevent oil from seeping in, but not so tight that you tear the delicate wrapper. I’ve found that a little cornstarch slurry as “glue” for sealing the edges works far better than water alone, creating a secure seal that won’t burst open during frying. Your patience here pays off!
Oil Temperature Management
The secret to perfectly crispy spring rolls without greasiness is maintaining the right oil temperature. I recommend using a thermometer to keep your oil between 350-375°F (175-190°C). If the oil is too cool, the wrappers absorb excess oil and become soggy; too hot, and they’ll burn before the filling heats through. Work in small batches of 3-4 rolls at a time to prevent temperature drops. After frying, drain them on a wire rack set over paper towels rather than directly on paper – this keeps that crispness intact by allowing air circulation while still absorbing excess oil.
Serving Ideas & Creative Variations
Dipping Sauce Pairings
The perfect dipping sauce elevates these spring rolls from delicious to unforgettable. My go-to classic is a simple sweet chili sauce, but I love offering a variety of options. A tangy soy-ginger sauce with a touch of honey brings out the savory notes in the chicken filling. For something creamy, try a peanut sauce with a hint of lime and sriracha. I also love a Vietnamese-inspired nuoc cham with fish sauce, lime, garlic and a touch of sugar. Set these out in small individual dipping bowls so guests can try different combinations without double-dipping. These sauces would also pair beautifully with my Buffalo Chicken Pinwheels for a fusion appetizer spread!
Filling Variations
While the classic chicken filling is fantastic, these spring rolls are incredibly versatile and customizable. For a seafood version, substitute chopped shrimp for an elegant twist. Vegetarian guests will love a mushroom and tofu filling with extra ginger and garlic. My family’s current favorite is a Korean-inspired version with ground chicken, kimchi, and a touch of gochujang for heat. You can also play with the vegetables – try adding bean sprouts for extra crunch, water chestnuts for texture, or even mango for a sweet-savory combination. Just remember to keep the moisture level consistent so your wrappers stay crisp.
Storage & Troubleshooting Guide
Proper Storage Methods
For the best texture preservation, store any leftover cooked spring rolls in a single layer on a paper towel-lined container in the refrigerator. They’ll keep for 3-4 days, though the wrappers will naturally soften over time. To reheat, avoid the microwave which will make them soggy. Instead, place them on a baking sheet in a 350°F (175°C) oven for 8-10 minutes until heated through and re-crisped. If you want to freeze them, I recommend freezing them uncooked – arrange filled but unfried rolls on a parchment-lined baking sheet, freeze until solid, then transfer to a freezer bag where they’ll keep for up to 3 months.
Troubleshooting Common Issues
If your spring rolls are bursting during frying, you’re likely overfilling them or not sealing the edges properly. Use about 2 tablespoons of filling per roll and make sure to leave a half-inch border around the edges before rolling. If they’re browning too quickly but staying raw inside, your oil is too hot – lower the temperature and give them more time. For rolls that turn out greasy, your oil likely isn’t hot enough. And if your wrappers tear easily during rolling, they may be too dry – keep them covered with a damp cloth and work with one wrapper at a time. Remember that practice makes perfect – each batch will be better than the last!
Frequently Asked Questions
Can I bake these Crispy Homemade Chicken Spring Rolls instead of frying?
Yes! Brush them lightly with oil and bake at 425°F for 15-20 minutes, turning halfway. They won’t be quite as crispy as fried, but still delicious with much less oil.
Can I make these ahead for a party?
Absolutely. Prepare the filling up to 2 days ahead and store refrigerated. You can even roll them 4-6 hours before cooking and keep covered with a slightly damp cloth in the refrigerator.
What’s the best oil for frying spring rolls?
Use a neutral oil with a high smoke point like vegetable, canola, or peanut oil. Avoid olive oil, which has too strong a flavor and lower smoke point.
How do I prevent the wrappers from drying out?
Keep unused wrappers covered with a damp (not wet) kitchen towel while working. Only remove one wrapper at a time from the package.
How thin should I chop the vegetables for the filling?
Aim for fine, matchstick cuts or small dices about 1/8-inch thick. This ensures quick cooking and prevents large pieces from tearing the wrappers.
Final Thoughts
Creating Crispy Homemade Chicken Spring Rolls from scratch might seem intimidating at first, but the results are absolutely worth the effort. There’s a special pride that comes from mastering this technique and watching friends and family devour something you’ve made with your own hands. The beautiful golden color, the satisfying crunch, and the burst of flavors make these spring rolls a standout addition to your cooking repertoire. I’d love to see your creations – tag me on Pinterest with your spring roll success stories!