

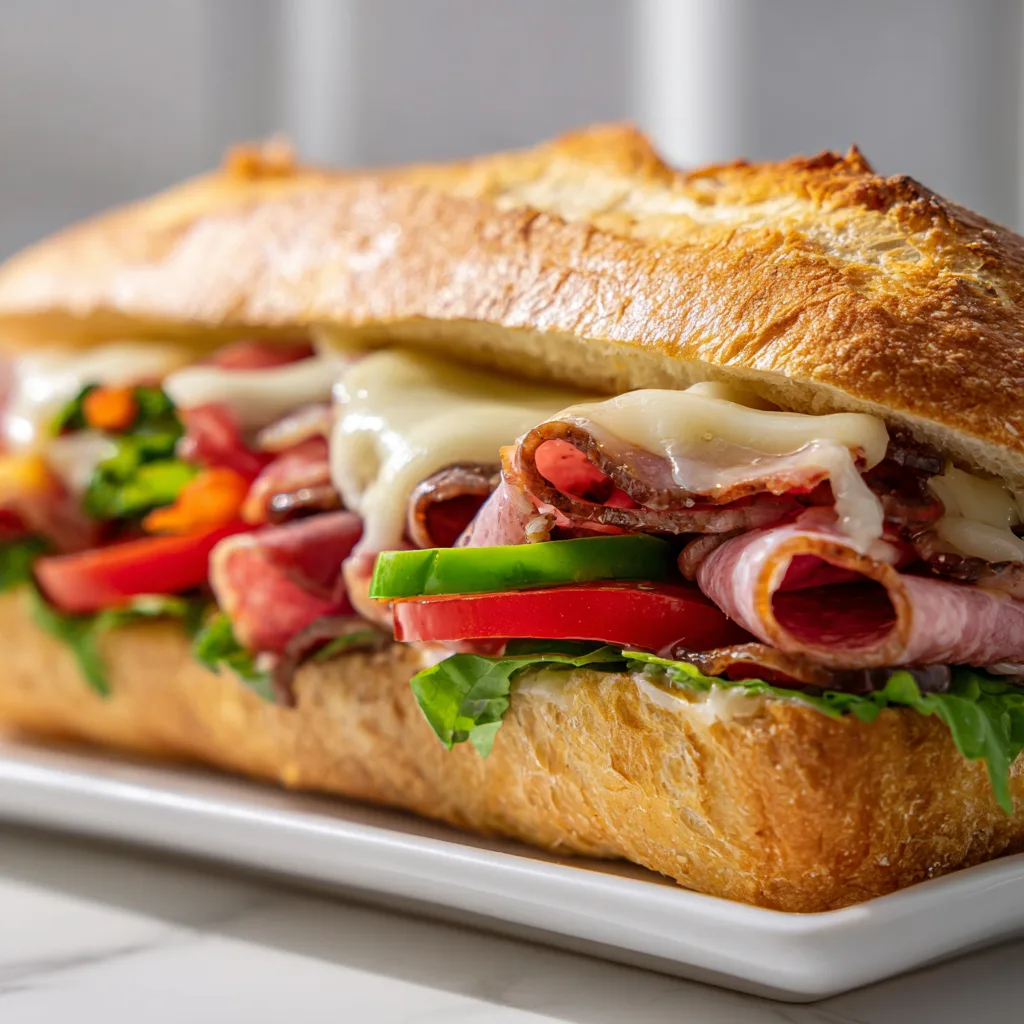
There’s something magical about a Baked Italian Sub Sandwich that transforms an ordinary lunch into a celebration. The moment that crusty bread hits the oven, my kitchen fills with the intoxicating aroma of melting cheese, savory meats, and Italian herbs. I’ve perfected this recipe over countless Sunday gatherings, and it never fails to draw everyone to the table before I can even call them for lunch. This isn’t just a sandwich—it’s layers of thinly-sliced meats, provolone cheese, and zesty toppings all wrapped in a warm, toasty embrace that’ll make you wonder why you ever settled for cold subs.
Table of Contents
Recipe
Print
Delicious Baked Italian Sub Sandwich Recipe | Easy & Flavorful Meal Ideas
- Prep Time: 10 minutes
- Cook Time: 12 minutes
- Total Time: 22 minutes
- Yield: 4 sandwiches
- Category: Lunch
- Method: Baked
- Cuisine: Italian-American
Description
This Delicious Baked Italian Sub Sandwich Recipe is loaded with layers of deli meats, melty cheese, and tangy dressing — baked to golden perfection. An easy and flavorful meal idea that’s perfect for lunch, dinner, or sharing at parties!
Ingredients
4 hoagie rolls or sub sandwich buns
4 tablespoons Italian dressing
8 slices provolone cheese
8 slices ham
8 slices salami
8 slices pepperoni
1/4 cup sliced banana peppers
1/4 cup sliced red onion
1/2 cup shredded lettuce (optional, for topping after baking)
1 tomato, thinly sliced (optional)
1 teaspoon Italian seasoning
1 tablespoon melted butter
Optional garnish: chopped parsley or grated Parmesan
Instructions
1. Preheat oven to 375°F (190°C). Line a baking sheet with foil.
2. Slice hoagie rolls lengthwise but not all the way through. Brush insides lightly with Italian dressing.
3. Layer 1 slice of provolone, ham, salami, pepperoni, banana peppers, and red onion inside each roll. Top with another slice of provolone.
4. Brush tops of rolls with melted butter and sprinkle with Italian seasoning.
5. Wrap each sandwich loosely in foil and bake for 10–12 minutes, until cheese is melted and sandwiches are heated through.
6. Unwrap and broil for 1–2 minutes for a golden crust, if desired.
7. Top with shredded lettuce, tomato slices, and extra Italian dressing before serving.
Notes
Customize with your favorite deli meats like turkey or mortadella.
Make ahead: assemble sandwiches, wrap in foil, and refrigerate until ready to bake.
Add a drizzle of balsamic glaze for a gourmet touch.
Serve with chips, pasta salad, or a side of marinara sauce for dipping!
Why You’ll Love This Baked Italian Sub Sandwich
A Symphony of Flavors and Textures
The magic of this sandwich happens when it’s baked—the exterior becomes delightfully crispy while the inside transforms into a gooey, melty paradise. Each bite delivers that perfect textural contrast between the crunchy bread and the warm, tender fillings. The Italian meats—salami, capicola, and pepperoni—release their savory oils as they heat, infusing everything with rich flavor. Meanwhile, the provolone cheese melts into every nook and cranny, creating those irresistible cheese pulls that make everyone reach for their phones to capture the moment. It’s comfort food that feels slightly sophisticated.
Make-Ahead Miracle for Entertaining
What makes this Baked Italian Sub Sandwich a true hero is its entertaining potential. I can assemble these beauties hours before guests arrive, wrap them tightly in foil, and refrigerate until party time. When hunger strikes, I simply pop them in the oven for 15-20 minutes. The result? Hot, melty sandwiches with minimal effort during the actual gathering. This has saved me countless times during football Sundays and impromptu get-togethers. Plus, they’re substantial enough to satisfy hungry appetites while being easy to slice into smaller portions for sharing—perfect for those chicken pesto sandwiches lovers looking to try something new.
Essential Tips & Tricks
Bread Selection & Preparation
The foundation of your sandwich begins with the right bread. I recommend a sturdy Italian or French loaf with a crisp exterior and soft interior. Avoid pre-sliced bread—you want to control the depth of your cut, leaving the bottom intact to create a hinged pocket that holds everything together. Before adding any ingredients, I lightly hollow out some of the soft interior. This creates space for fillings without compromising structural integrity. A quick brush of olive oil and garlic on the inside surfaces before adding meats creates an extra flavor barrier that prevents sogginess and adds that authentic Italian sub shop taste.
Layering Strategy for Perfect Results
The layering order makes all the difference between a good sandwich and a great one. Start with a base layer of provolone on both sides—this creates a moisture barrier that protects your bread. Next, alternate your meats and additional cheese, folding each slice to create height and texture. Keep thinly sliced tomatoes, pickled peppers, and other wet ingredients toward the center, sandwiched between cheese layers. For that signature Italian flavor, sprinkle dried oregano, red pepper flakes, and a drizzle of creamy garlic parmesan sauce between layers rather than just on top—this distributes flavor throughout every bite.
Serving Ideas & Creative Variations
Perfect Pairings for a Complete Meal
Serve these hearty sandwiches alongside lighter sides to balance the meal. A simple arugula salad dressed with lemon and olive oil cuts through the richness perfectly. For something more substantial, my garlic butter parmesan knots make an irresistible companion—the flavors complement each other beautifully. During summer months, I love serving these with marinated vegetable antipasto or a cool cucumber salad. For drinks, nothing beats a sparkling Italian soda or, for adult gatherings, a light red wine like Chianti. The sandwich is filling enough to stand alone, but these pairings elevate it from a simple lunch to a memorable dining experience.
Regional and Dietary Adaptations
The beauty of the Baked Italian Sub lies in its versatility. For a New Orleans twist, add olive salad to create a muffuletta-inspired version. Craving something spicier? Incorporate calabrian chili spread or hot capicola. For lighter options, turkey and chicken can replace traditional cured meats while still delivering satisfaction. Vegetarian guests won’t feel left out with a version loaded with grilled vegetables, pesto, and multiple cheeses. For gluten-sensitive friends, the fillings work beautifully as a hot sandwich casserole layered over gluten-free bread. The Italian flavor profile is forgiving and welcomes creative interpretations while maintaining that essential comforting quality.
Storage & Troubleshooting Guide
Preventing Sogginess and Maintaining Freshness
Nothing ruins a sandwich faster than soggy bread. To prevent this disappointment, consider these strategies: First, toast the bread lightly before assembly. This creates a protective barrier against moisture from fillings. Second, place watery ingredients like tomatoes and pickled peppers between layers of meat and cheese rather than directly against the bread. If preparing in advance, wrap assembled but unbaked sandwiches in parchment paper first, then aluminum foil, and refrigerate. This allows some air circulation while protecting freshness. For leftover baked sandwiches, store them unwrapped in the refrigerator, then reheat in a 300°F oven until crisp again—never use the microwave.
Troubleshooting Common Issues
Even experienced cooks encounter sandwich setbacks. If your cheese isn’t melting properly, you likely have it too far from the heat source or your oven temperature is too low. For best results, bake on the middle rack at 375°F. Finding your sandwich too dry? Brush the cut sides with a mixture of olive oil, vinegar, and Italian herbs before assembly. If the bottom is getting soggy while the top remains dry, try baking open-faced for the first 10 minutes, then closing and finishing for 5-7 minutes more. For sandwiches that fall apart when slicing, let them rest 5 minutes after baking and use a very sharp serrated knife in a gentle sawing motion.
Frequently Asked Questions
Can I make Baked Italian Sub Sandwiches ahead of time?
Yes! Assemble up to 24 hours ahead, wrap tightly in foil, and refrigerate. Bake directly from the refrigerator, adding 5-7 minutes to the baking time.
What’s the best cheese for a Baked Italian Sub Sandwich?
Provolone is traditional, but a combination of provolone and mozzarella creates the perfect melt. For extra flavor, add a sprinkle of parmesan or pecorino romano.
How do I prevent my sandwich from getting soggy?
Toast the bread lightly before assembly, use a thin layer of mayo or olive oil as a moisture barrier, and place wet ingredients between layers of meat and cheese.
Can I freeze these sandwiches before baking?
Yes, wrap tightly in plastic wrap then foil and freeze for up to 1 month. Thaw in refrigerator overnight before baking.
What’s the best way to reheat leftovers?
Reheat in a 300°F oven for 10 minutes or until warmed through. Avoid microwaving as it makes the bread soggy and tough.
Final Thoughts
The Baked Italian Sub Sandwich has earned its place as a staple in my entertaining repertoire. There’s something deeply satisfying about transforming simple ingredients into something that consistently draws “wows” from family and friends. Whether you’re feeding a crowd or just treating yourself to an elevated lunch experience, this sandwich delivers that perfect balance of convenience and indulgence. For more inspiration and variations, check out my Pinterest collection where I’m constantly adding new sandwich ideas. Happy baking, and enjoy every melty, crispy, flavorful bite!