

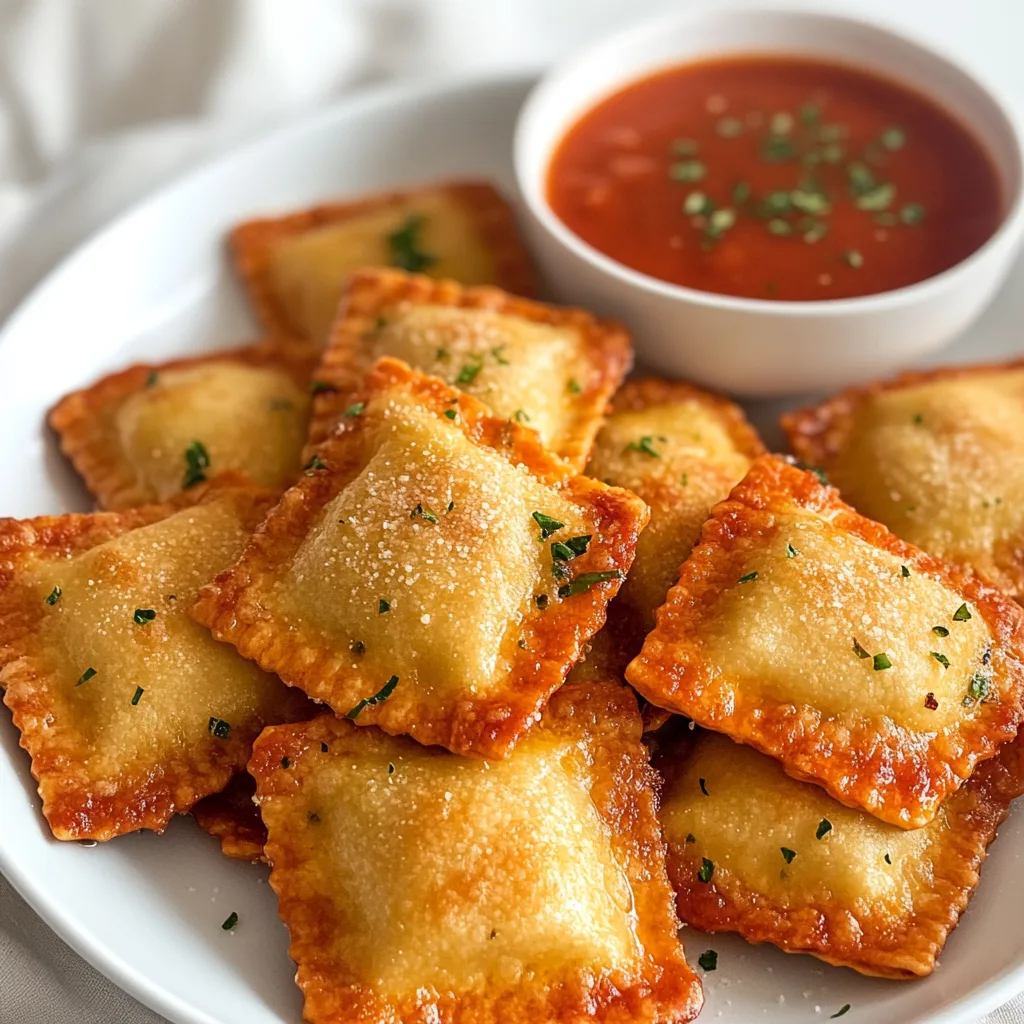
Cheese-Filled Toasted Ravioli has been my secret weapon for dinner parties that leave guests wide-eyed with delight. These golden, crispy pockets of joy deliver the perfect crunch before revealing a molten cheese center that stretches with each bite. I’ve perfected this recipe through countless Friday night gatherings, and the way the aromatic Italian herbs mingle with the toasty breadcrumb coating creates an experience that’s impossible to resist. Whether you’re planning a cozy night in or need an impressive appetizer that won’t keep you chained to the kitchen, these ravioli bites from Treatiful will become your new go-to indulgence.
Table of Contents
Recipe
Print
Delicious Cheese-Filled Toasted Ravioli Recipe | Crispy & Cheesy Appetizer
- Prep Time: 15 minutes
- Cook Time: 15 minutes
- Total Time: 30 minutes
- Yield: 4 servings
- Category: Appetizer
- Method: Baked, Air Fryer
- Cuisine: Italian-American
- Diet: Vegetarian
Description
Delicious Cheese-Filled Toasted Ravioli is a crispy, golden appetizer packed with melty cheese and Italian flavor. Breaded ravioli are baked or air-fried until crunchy on the outside and perfectly cheesy inside—an irresistible snack or party favorite.
Ingredients
1 package cheese-filled ravioli (fresh or frozen)
2 eggs
1 cup breadcrumbs or panko
1/2 cup grated parmesan cheese
1 tsp Italian seasoning
1/2 tsp garlic powder
Salt and black pepper, to taste
Oil spray or oil for baking/air frying
For serving:
Marinara sauce
Instructions
1. Preheat oven to 200°C (400°F) or air fryer to 190°C (375°F).
2. Cook ravioli briefly according to package instructions if frozen. Drain and pat dry.
3. Whisk eggs in a bowl.
4. In another bowl, mix breadcrumbs, parmesan, Italian seasoning, garlic powder, salt, and pepper.
5. Dip each ravioli into egg, then coat evenly in breadcrumb mixture.
6. Place ravioli on a lined baking sheet or air fryer basket.
7. Lightly spray with oil.
8. Bake for 15–18 minutes or air fry for 8–10 minutes until golden and crispy.
9. Serve warm with marinara sauce for dipping.
Notes
• Mozzarella or four-cheese ravioli work best.
• Flip halfway through baking for even crispiness.
• Best served fresh and hot.
Why You’ll Love This Cheese-Filled Toasted Ravioli
Perfect Texture Contrast
The magic of these toasted ravioli lies in their textural symphony—crispy exterior giving way to tender pasta and gooey cheese. I’ve found that double-dipping in the egg mixture creates that restaurant-quality crunch that makes them irresistible. The panko breadcrumbs toast to golden perfection while the interior stays delicately chewy. When you pull them apart, that moment when the melted cheese stretches between the halves is pure kitchen poetry. It’s the kind of appetizer that makes conversation stop momentarily as everyone savors the first bite.
Quick Prep, Big Impact
Despite their impressive appearance, these cheese-filled treasures require minimal effort—just 25 minutes from start to finish. I love recipes that deliver maximum flavor with minimum fuss, especially when entertaining. The simple coating process moves quickly once you get into a rhythm: dip, coat, place. You can even prep them earlier in the day and refrigerate until ready to bake. This efficiency makes them perfect for those evenings when you want something special but don’t have hours to spend in the kitchen.
Essential Tips & Tricks
Choosing the Right Ravioli
The foundation of extraordinary toasted ravioli starts with selecting the perfect base. I prefer refrigerated ravioli over frozen for this recipe—they maintain their structure better during the coating process. Look for ravioli with generous cheese filling; the four-cheese variety creates the most luxurious melt. For an elevated experience, try specialty ravioli with mascarpone or fontina. The pasta should be firm but not too thick, allowing for quick cooking while protecting that precious filling from leaking during the baking process.
Perfecting the Coating Process
Creating that ideal crunchy shell requires attention to detail in your breading station. I arrange my dipping ingredients in a specific sequence—flour, egg wash, seasoned breadcrumbs—to keep one hand dry and one wet throughout the process. Adding a tablespoon of grated parmesan to the breadcrumbs introduces another layer of flavor that toasts beautifully. For extra crispiness, try chilling the coated ravioli for 15 minutes before baking. This helps the coating adhere perfectly, similar to the technique used for Pizza Rolls with Mozzarella and Garlic Butter.
Serving Ideas & Creative Variations
Dipping Sauce Pairings
The right dipping sauce elevates these toasted ravioli from delicious to memorable. My classic marinara with fresh basil brings bright acidity that cuts through the richness perfectly. For something unexpected, try a roasted garlic aioli or spicy arrabbiata that adds gentle heat. I often serve a trio of dipping options—traditional marinara, creamy pesto, and a balsamic glaze—arranged in small ramekins surrounding the ravioli platter. The combination of warm ravioli and cool dipping sauces creates a temperature contrast that enhances the entire experience.
Creative Flavor Twists
While traditional cheese ravioli delivers comfort food perfection, experimenting with fillings and coatings creates exciting variations. Try buffalo-style by adding hot sauce to the egg wash and serving with blue cheese dipping sauce. For a Mediterranean twist, use spinach and feta ravioli coated in breadcrumbs mixed with lemon zest and oregano. You could even create a dessert version using chocolate-filled ravioli coated in cinnamon-sugar breadcrumbs! These variations pair beautifully with heartier dishes like Cheesy Baked Mostaccioli Pasta for a complete Italian-inspired feast.
Storage & Troubleshooting Guide
Keeping Them Crispy
Maintaining that satisfying crunch factor when storing leftover toasted ravioli requires proper technique. Allow them to cool completely before refrigerating to prevent condensation that leads to sogginess. Store in a single layer separated by parchment paper in an airtight container. When reheating, avoid the microwave which steams them—instead, place on a wire rack in a 350°F oven for 7-10 minutes until heated through. This method recrisps the exterior while gently warming the filling without making it rubbery or causing the cheese to separate.
Fixing Common Issues
Even experienced cooks occasionally encounter challenges with toasted ravioli. If your coating falls off during baking, the culprit is likely moisture control. Ensure ravioli are patted completely dry before starting the coating process. For leaking filling, lower your oven temperature slightly and reduce cooking time. If your breadcrumbs aren’t browning evenly, try a light spray of olive oil before baking. Remember that different ravioli brands vary in thickness and moisture content, so watch them closely the first time you make this recipe with a new product.
Frequently Asked Questions
Can I use frozen ravioli for this recipe?
Yes, but thaw them completely first and pat dry with paper towels. Frozen ravioli retain more moisture, which can make the coating soggy if not properly dried before breading.
What’s the best oil for spray-coating the Cheese-Filled Toasted Ravioli?
Extra virgin olive oil spray provides the best flavor, but avocado oil works well too. Use a light touch—you want just enough to promote browning without making them greasy.
Can I make these in an air fryer?
Absolutely! Cook at 375°F for 8-10 minutes, flipping halfway through. The air fryer creates exceptionally crispy results with even less oil than the oven method.
How do I prevent the cheese from leaking during baking?
Avoid piercing the ravioli during handling and ensure your oven is fully preheated. A slightly lower temperature (375°F instead of 400°F) with a longer bake time helps prevent explosive cheese leaks.
Can I prepare these ahead for a party?
Yes! Bread them up to 8 hours ahead and refrigerate uncovered. Add 2-3 minutes to the baking time when cooking from chilled for perfect results.
Final Thoughts
These Cheese-Filled Toasted Ravioli have become my signature appetizer for good reason—they deliver restaurant-quality results with home kitchen simplicity. The combination of crispy exterior, tender pasta, and molten cheese creates an irresistible bite that disappears from platters within minutes. I love watching friends discover that perfect balance of textures and flavors, especially when paired with vibrant dipping sauces. For more inspiration and variations, check out my collection of Italian-inspired recipes on Pinterest. Your kitchen will be filled with the most enticing aromas, and your guests will be begging for the recipe!